
A pool of water at the base of your water heater is never a good sign. However, it doesn’t always mean that you need to replace your water heater. Once you locate the source of the leak, it’s easy to determine if you need a simple repair or a new water heater.
Water leaking from the bottom of your water heater occurs because either the drain valve is faulty, the temperature and pressure valve is faulty, or the internal tank is damaged from sediment.
This article gives a detailed explanation on how to locate the cause of the leak at the bottom of your water heater. It also gives clear step-by-step instructions on how to fix each potential problem.
3 causes of water leaking from the bottom of your water heater
1. Broken or half-closed drain valve
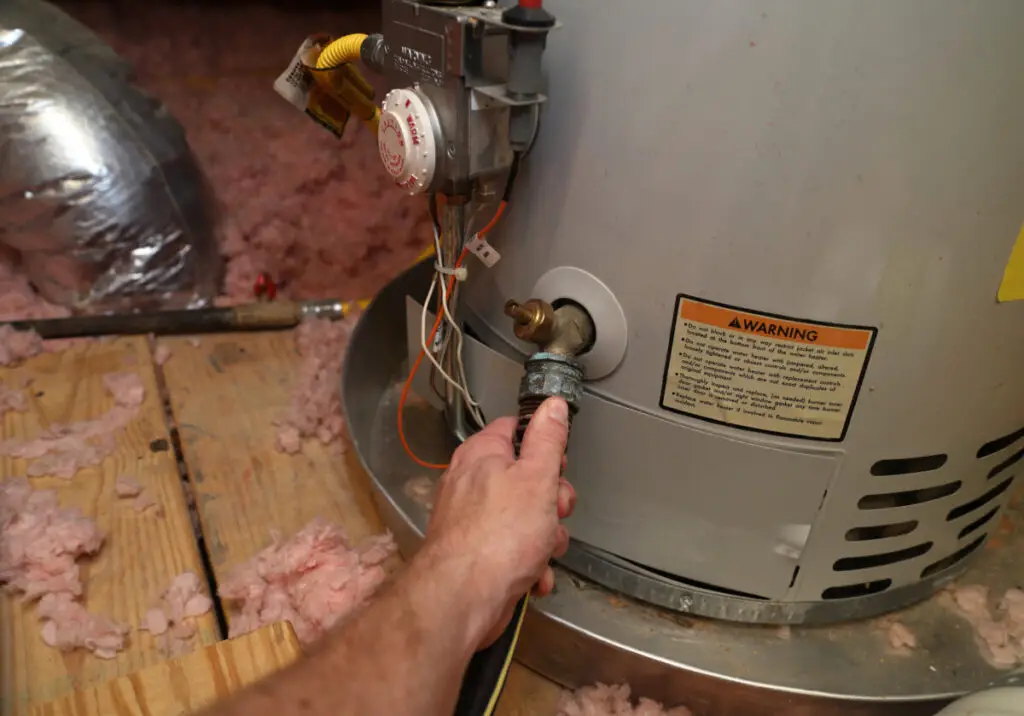
The drain valve is the part of the water heater that drains out water during maintenance or repairs. It’s also responsible for flushing out sediments that accumulate at the bottom of your water heater tank.
To check the state of the drain valve, locate it at the bottom of your heater. If there’s water dripping from it, then it’s the reason why water is leaking from the bottom of your water heater.
First, tighten the valve and see if the water stops dripping. If it was merely loose, it should stop dripping. If it doesn’t, that means the valve is broken and needs a replacement. The steps for this process are discussed in the next section.
2. Faulty temperature and pressure valve (T&P Valve)
The T&P valve is a safety feature that helps to release excess pressure through a discharge tube that faces the floor. This valve is always dry in a properly functional water heater.
If the pressure gets too high in the tank, water is sprayed through the discharge tube as the pressure drops. So, the discharge tube directs the water to the bottom of your water heater and prevents water from spraying around.
Over time the valve can corrode to the point where it doesn’t function properly. If you check your discharge tube and there’s water dripping from it, then the T&P valve is your leak source.
If the T&P valve is a leak source, it should be fixed as early as possible.
3. Internal tank damage
This is the most common reason why your water heater is leaking from the bottom.
Your hot water tank may be suffering from an internal, structural problem that is allowing water to leak out and pool at the bottom of your water heater. If your drain valve and T&P valve are fine, then this is the next plausible explanation.
A faulty tank typically results from failure to remove sediments from the hot water tank. If you live in an area with very hard water, you should flush out your tank at least every six months.
It’ll prevent sediments from accumulating, and encouraging corrosion and cracking of the tank internal part. Corrosion and cracking cause leaks to develop and form a water pool at the bottom of your water heater.
If this is the source of the water leaking from the bottom of your water heater, you’ll need to change the water heater completely. It’s advisable to hire a plumber to check it out before you buy a new unit, for confirmation sake and to save you unnecessary expenses.
The longer you’ve used your water heater, and the frequency of sediment removal usually determines the lifespan of your tank.
How to fix water leaking from the bottom of your water heater
After you’ve located the source of the leak, the next thing is to turn off the power and the water supply to the water heater to prevent any further damages to the floor or the heater. You can do this by using the emergency shutdown button of your water heater, if it has one.
If it doesn’t, turn off the electricity or gas supply as it applies to your water heater. To turn off the water supply, find the dial or lever located at the water supply inlet at the top of the heater and switch it off.
Fixing the drain valve
You’ll need a replacement T&P valve, pipe wrench, flat blade screwdriver, Teflon tape, rags or towels, and a garden hose.
Follow these steps to replace the drain valve:
- Make sure that your water heater is turned off
- Fasten a garden hose to the drain valve at the bottom of the heater
- Run the other end of the hose to the nearest floor drain or a safe spot outside.
- Close the shut-off valve at the cold water inlet line; the main water supply.
- Open a hot water faucet somewhere in the house to release the pressure in the water heater tank. Then close it.
- Open the drain valve with a flat blade screwdriver and allow the water to drain out. You’ll probably notice white sediments at the draining end of the hose. Remember it’s hot water, so be careful to avoid any scalding (If the water doesn’t drain, call a professional because that might indicate clogging by sediments).
- When all the water is drained out, close the valve and remove the hose.
- Remove the old drain valve with a wrench. Some additional water may drain out during this step, so use the rags to dry it up.
- Use Teflon tape to seal the threads on the new drain valve, preferably in the direction that you will screw it back in. At least 6 rounds of tape is enough.
- Screw in the new drain valve and tighten with a wrench.
- Open a hot water faucet somewhere inside and open the shut-off valve. You’ll hear the heater start to fill.
- When you have a steady stream of water from the faucet, turn it off.
- Check to make sure there are no leaks or drips from the drain valve
- Check again for leaks after 24 hours.
If there’s no more water leaking from the bottom of your water heater, you’ve successfully replaced the drain valve.
If not, you may have diagnosed wrong or the valve isn’t tightened enough.
The temperature and pressure valve
What you’ll need: a replacement T&P valve, a PVC drain line, pipe wrench, extension bar, flat blade screwdriver, Teflon tape, rags and towels, and garden hose.
- Attach an end of the garden hose to the drain valve at the bottom of the heater.
- Run the other end of the garden hose to the nearest drain
- Close the shutout valve at the cold water inlet line or main water supply.
- Open a hot water faucet somewhere in the house to release the pressure in the system tank.
- Open the drain valve and allow approximately one gallon of water to drain out.
- Detach the runoff tube or PVC drain line connected to the T&P valve (located at the top of the tank)
- Remove the old T&P valve with a wrench. You may need an extension bar for extra leverage. There may be additional water draining, so have some rags handy at this stage.
- Use Teflon tape to seal the threads on the new valve. Preferably in the direction that the pieces will be screwed together. At least 6 rounds of tape is enough.
- Screw in the new valve and make sure it is in the closed position. Use a wrench to tighten.
- Reconnect the new PVC drain line to the T&P valve.
- Now open a hot water faucet somewhere inside and open the shut-off valve. You’ll hear the heater start to fill.
- Lift the lever on the T&P valve. When you have a steady flow of water from the T&P drain line, close the lever valve.
- When you have a steady stream of water from the faucet, turn it off.
- Turn the power back on or the gas supply.
- Check the T&P valve one more time to make sure it’s tightened.
Internal tank
A leak caused by internal damage almost always means the water heater will need to be replaced.
The two options you have are to get a plumber to confirm the problem or get a new water heater..
Oftentimes, you need a new heater.
Should I turn off my water heater if it is leaking?
If you observe any leaks from any part of your water heater, it is advised that you turn it off at the power source and the main water supply.
You can do this after you may have identified the cause of the leak by checking different parts of your water heater.
Turning off your unit will help prevent further damages to the floor and potential flooding, since the water heater refills as quickly as it loses water.
You can then proceed to fix the problem yourself or seek professional help.
How long will a leaking water heater last?
A leaking water heater is not something you want to manage. It could cause damages to your flooring, walls and other utilities within close proximity, especially if there’s excess pressure in it.
The longer it leaks, the worse the system gets, and the more it goes beyond repair if repairs was all it needed.
If you notice a leak and you’re not willing to do the dirty work, get a plumber to attend to your water heater as soon as possible.
Why your water heater is leaking from the thermostat
Water leaking from the thermostat is usually due to corrosion on the threads which is preventing a tight seal.
To solve this problem, you’ll need a new thermostat for replacement.
After the replacement, you can then decide if it’s better to replace the entire water heater.
Can I shower if my water heater is leaking?
A leaking water heater is worrisome but not necessarily dangerous. You can take a shower if your water heater is leaking.
However, you should figure out the source of the leak soon enough to prevent water damage.
Conclusion
The severity of water leaking from the bottom of your water heater depends on the source. Either way, it is an issue that should be addressed early enough to prevent any further damages.
To prolong the life of your water heater, and especially prevent internal damage, remember to flush out sediments every once in a while.
The harder your water, the more frequently you should flush the tank.