
The most common reason for an under-sink water filter to be slow is a clogged filter. Low flow or pressure from the main water source, poor water quality, a kink in the water line, closed valves, or a clogged faucet aerator can also slow the water coming from an under-sink water filter.
Although under sink water filters offer the distinct advantage of being hidden from view, they are not without flaws. Many under-sink water filter owners have the irritating problem of water flow turning painstakingly slow, making you wonder why you even got the filter in the first place. If this sounds like you at the moment, you’ve come to the right place!
In this post, we discuss all of these problems in detail, including information on how you can identify the issue with your filter on your own. Since most of these problems do not require you to call a plumber to solve, we also provide solutions whenever possible so that you can perform basic maintenance of your under-sink filter yourself. Let’s get started!
How an under-sink water filter should work
To be able to determine the problem with your under-sink filter, it’s important that you first have a basic understanding of how the water should flow through the filtration system.
Basically,
1. There is an incoming water tubing with a certain pressure of water.
2. This water reaches the filter unit. There may be valves at this point between the primary water flow and the filter housing.
3. Inside the filter housing, there are one or more filter cartridges that actually clean your water.
4. This water now goes to the outlet pipeline.
5. Finally, it enters your sink via an aerator in your faucet.
Once we understand this basic flow, it gets easier to visualize where the problem might be in the steps below.
6 Reasons why your under-sink water filter is so slow (or has no flow)
1. Clogged Filter
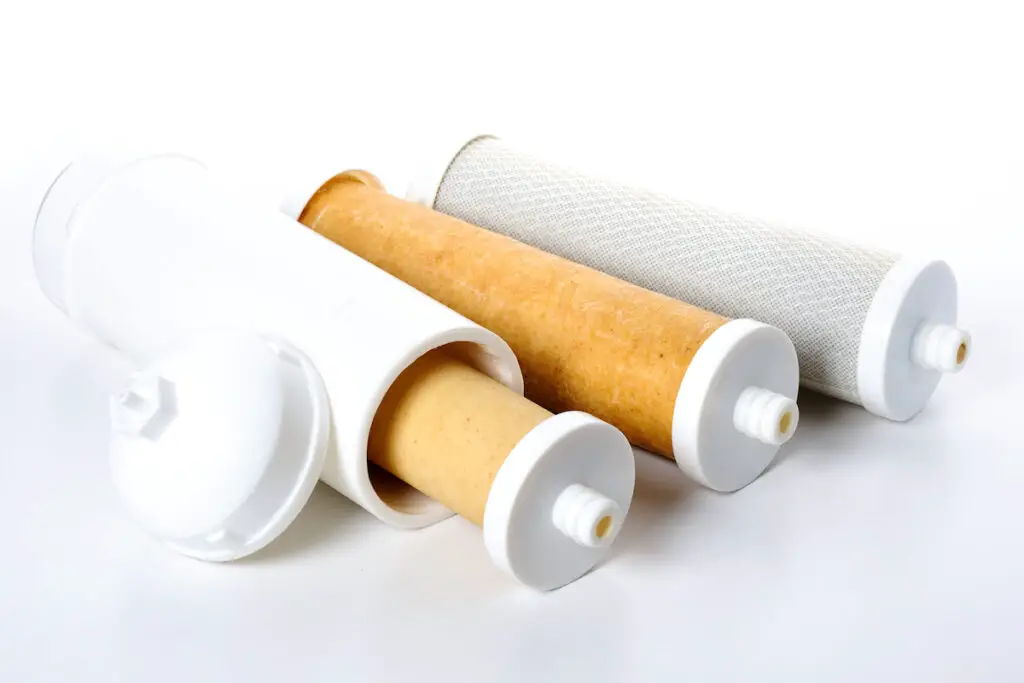
The most common reason for your under sink water filter to slow down is clogged filter cartridges.
Every time water flows through your filter, a small amount of dirt or contaminants is left behind in the filter unit.
Over time, this leads to the filter’s flow slowing down, or even stopping.
This is why the cartridges in your filter unit come with a specific lifespan, and it is very important that you replace these cartridges on time.
However, your filter can still be clogged even if you have been following the instructions on when to change your filter cartridges. This happens when you use the water from a particular sink more often, or if your water is naturally hard (high in calcium and magnesium) or has lots of sediment in it.
How to diagnose:
- A characteristic symptom of this issue is the flow slowing down gradually over time, instead of slowing all at once.
- You can open your filter unit (if allowed by the manufacturer without voiding your warranty) and see if the cartridges appear unclean. This could mean a greenish or brown discoloration over the cartridge.
- Use your users manual to find out how much water each filter should be able to treat. Then estimate how much water you use on average. This is how filter replacement indicators work – they divide the amount of water your filter can treat by how much you are likely to use in a given day. The indicator then alerts you after that many days. If you work out that you use more water each day, then your indicator may not be helpful, and you will need to manually determine when to change your filter (or simply look at it to see if it is getting clogged)
Solution:
Replace your filter. This should be the first (and likely the only) thing you’ll need to do to ensure a smooth flow throughout the year.
Don’t forget to clean the filter housing area and flush the new filter to make sure there is no debris that will interfere with the filter and slow your flow.
2. High Mineral Content

There is a term called TDS, which stands for the total dissolved solids in your water. If this value is high for the water supply at your home, then the filter needs to work extra hard to clean the water.
If you aren’t sure if you have high mineral content, apart from using a TDS meter you can check to see if your area is supplied with hard water. Hard water is high in dissolved minerals calcium and magnesium.

Common minerals linked with slow filters as they also build up a deposit inside your filter.
High TDS (or mineral content) results in the water flow being low or slow from 2 reasons:
- The minerals block (or clog) the filter over time
- It is harder (so slower) for the water to pass through the filter
How to diagnose:
- The flow of water shows a gradual decline, though it rarely ever stops.
- To be sure, you need to check the TDS level of the water supply at your home, and tally it up with the rating of your filter device. If the incoming water has a higher TDS/ mineral content than your filter can handle, it is likely that this is the cause for slowing of your filter.
Solution:
Unfortunately, this will be an ongoing problem and the only practical solution we can offer you is to get either 1) a different filter whose capacity matches the quality of your water or 2) a pre-filter to install before the water reaches your under-sink filter.
3. Low Pressure of Incoming Water
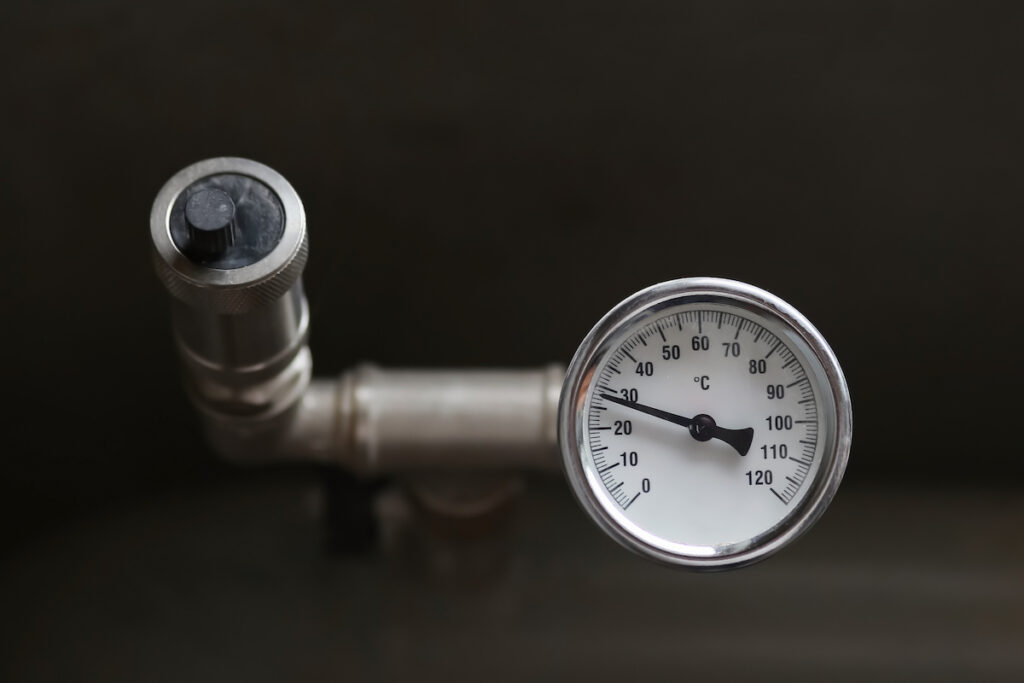
The primary driving force that pushes water through your under-sink filtration system is the pressure of the incoming water.
Naturally, if this pressure is low, the overall flow of water in your under-sink filter is going to be slow.
Even if the inflow water pressure is only fluctuating, this is enough to slow the flow rate from your filter.
How to diagnose:
- If the overall water flow in all the faucets of your home is slow or changing, the problem is most likely due to low incoming water pressure.
- However, if only the flow in your sink faucet is reduced, then the problem is likely something else.
The definitive way to confirm this is to measure the incoming water pressure in the central pipeline to your home.
If the pressure is less than 40 psi, then you may need to invest in some fixes. But before you spend some money, you can request a formal assessment from your local supplier.
Solution:
If you have figured that the problem could indeed be low pressure from the central water supply, contact your local supplier because this issue is best solved on a professional level and there is little you can do on your own.
However, if the pressure problem is related to your house, or a particular area of the house, an easy solution is to install an electric booster pump or motor before your under-sink filter (or even at the central supply) to increase the water pressure before it hits the filter.
4. Kink in the water line

The tubing that connects your under-sink filter to your faucet is often made of a softer, flexible material.
While many of these materials are kink-resistant, it is possible that the one in your under-sink filter isn’t.
And if there is a kink, it provides a very simple explanation as to why your filter isn’t working as well as it should.
How to diagnose:
Check the tubing of the filter system all the way from the filter outlet to your faucet. Any kink will be visible, if there are sections that you can’t see easily try to run your hand along it feeling for any kinks instead.
Solution
Simply rearrange the tubing so that it is no longer kinked. If the tubing is damage then you may need to replace it as well.
5. Clogged or Closed Valves
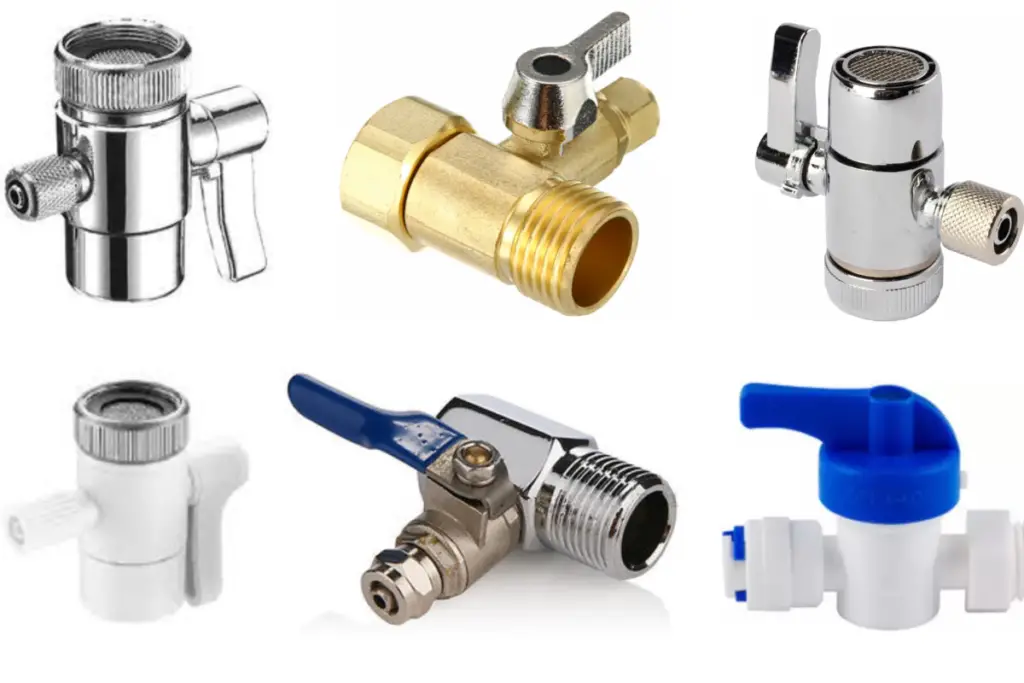
There are multiple types of valves in your under-sink filtration system, including saddle valves, dual check valves, and pressure limiting valves.
While you don’t necessarily need to know what all these valves do, it is important to understand that if any of these valves are partially or fully closed or clogged it can really slow the flow rate of your filter system.
How to Diagnose:
Usually, a closed or clogged valve is capable of eventually stopping the flow in your system entirely, though it is possible for a partially closed valve to decrease the flow rate without completely stopping it.
- To see if this is the cause, carefully check each of the valves on your system. You are looking to see if they are only partially open, or if there is something blocking them.
Please note, however, that not all these valves can be observed externally, so it may take a technician to determine if this is really the case.
Solution
If your manufacturer allows it, you may consider opening your filter unit to locate all the valves based on the instruction manual.
Open any closed valves you see, provided you find the lever for these valves.
Turning the valves all the way to the left will ensure they are fully open.
6. Closed or Clogged Faucet Aerator
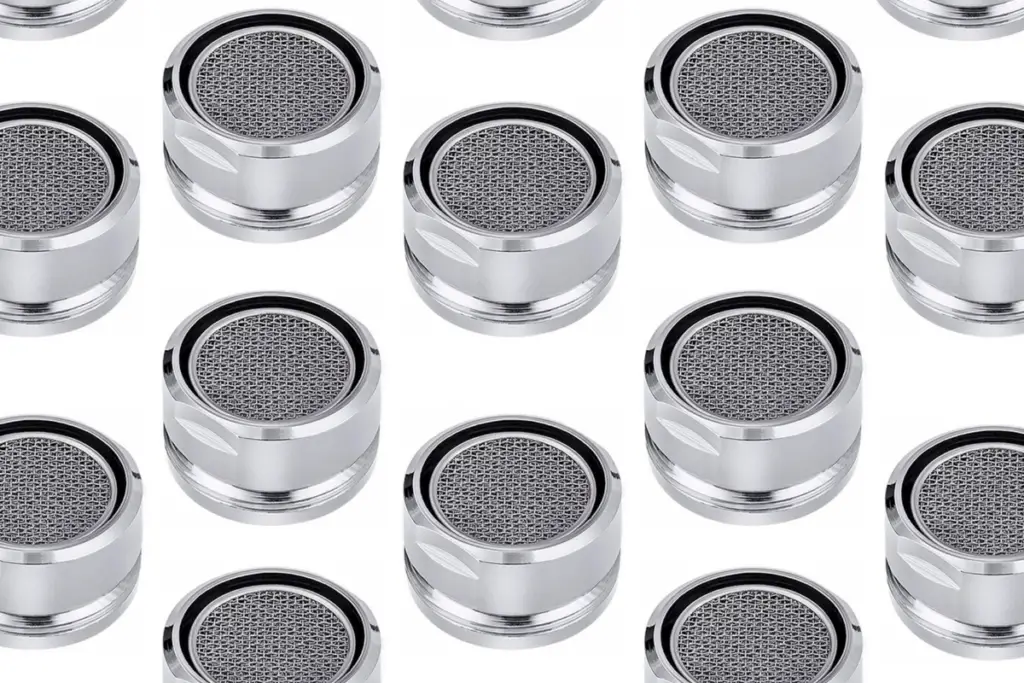
Sometimes, even when the intricate parts inside your under-sink filter are working just fine, you may still experience a decreased water flow owing to the final piece of the puzzle: the faucet aerator.
The faucet aerator is basically a small tool at the very end of the tubing of your faucet that incorporates air into the water and makes the flow more uniform.
It is also capable of collecting quite a lot of dirt or even minerals over time, which can lead to the filter’s flow rate slowing.
How to Diagnose:
In many sinks, the aerator can be removed from the faucet. If so, carefully remove the aerator following manufacturer’s instructions and see if there is anything blocking the water flow.
Even if the aerator is not removable, sometimes a careful look with a powerful flashlight may be enough to show you where the problem is.
Solution:
There are a few ways you can solve this:
- You can remove the aerator and try cleaning it with an old toothbrush. Some dish soap or some vinegar could really help at this point. Make sure the fit is tight when you replace it to prevent any unwanted leaks in the future.
- If cleaning seems too difficult, consider removing the aerator and simply replacing it with a new one.
- Ideally, when you already have an under-sink filter in place, the faucet aerator should not even be receiving enough dirt or minerals for there to be any significant buildup. It is therefore advisable to have a professional look at your filter and the quality of the water it is producing. (Or it may indicate that you also need to change your filter, and not just your aerator)
One final potential cause of slow water flow through your water filter is a leak. Water Purification Guide has a step-by-step process to help you diagnose and fix a leaking under-sink filter available here.
What PSI should my water filter be?
While every brand (and every filter) acts differently, in general, a minimum water pressure of 40-60 psi is needed to run most household water-based appliances, including water filters.
If the pressure is any lower, then the water may not pass efficiently through the filter, leading to either slowing of the filtration rate or compromise in the filtration quality.
How to clean an under-sink filter
Although specific methods do vary depending on the brand of the under sink water filter you have, there are some general steps that you can use to clean your under sink filter system:
- The first step is to stop the water flow to the overall filter system. There should be a knob somewhere before the water supply meets the filter housing. Use it to stop any water flowing into the system while you clean it.
- Next, open the faucet and empty out the pipeline as much as you can.
- Loosen the filter housings. It is possible to do so simply with your hands for some brands, while some may require you to use a wrench.
- Remove the cartridges and the housings, and separate them for cleaning.
- First, start by cleaning the O-rings. They are circular rings on top of the cartridges. You may simply wipe them clean, or you may replace these entirely (as most manufacturers often suggest).
- Next, start cleaning the cartridges.
The first is usually the sediment filter. Remove the collected sediments and clean the surfaces with an old toothbrush.
If there is excessive sediment build-up, consider replacing the cartridge altogether and potentially installing a pre-sediment filter.
Similarly, clean the remaining cartridges with a brush and some clean water.
- The next step is to clean the filter housing.
For this, simply use some warm, soapy water with a brush. At the end, rinse the housings with clean water.
- Next, prepare a solution with one gallon of water and 2-3 tablespoons of unscented bleach. Fill the housings with a cup of this solution each, and connect them to the main system without putting the cartridges back in.
Now, open the shut-off valve that you closed in the beginning, allowing the housing to fill with water. Open the faucet to allow this water to enter all the tubing of your filter unit, closing it right after it appears in the faucet.
Leave this for 30 minutes, and then run the faucet open.
- Remove the housings again, cleaning them with clean water to remove any remnants of the sanitizing solution you prepared.
- Finally, reassemble everything back together.
With this, your filter system is now clean and ready for use.
Conclusion
Having an under-sink filter means that the flow of water is going to be lesser than what it would have been without a filter, even when the filter is working just fine.
However, if the flow has decreased significantly, there is a good chance that there is something wrong with some component of the filter unit or the tubing.
Proper cleaning and maintenance can help solve most of these issues, but you should never hesitate to contact the manufacturer for support in case any of these issues persist.