
According to the FDA, reverse osmosis (RO) is one of the most common water filtration methods used in the United States. Waterdrop is one of the best brands available and it’s important to know how to install your Waterdrop RO system correctly.
This article will take you through how to install ALL the Waterdrop reverse osmosis systems, give a step-by-step guide on how to flush the system, and provide instructions on how to change a filter on a Waterdrop RO system. We’ll also cover the Waterdrop error codes for each system and how to fix them and where you can buy replacement filters.
How to install ALL Waterdrop reverse osmosis systems
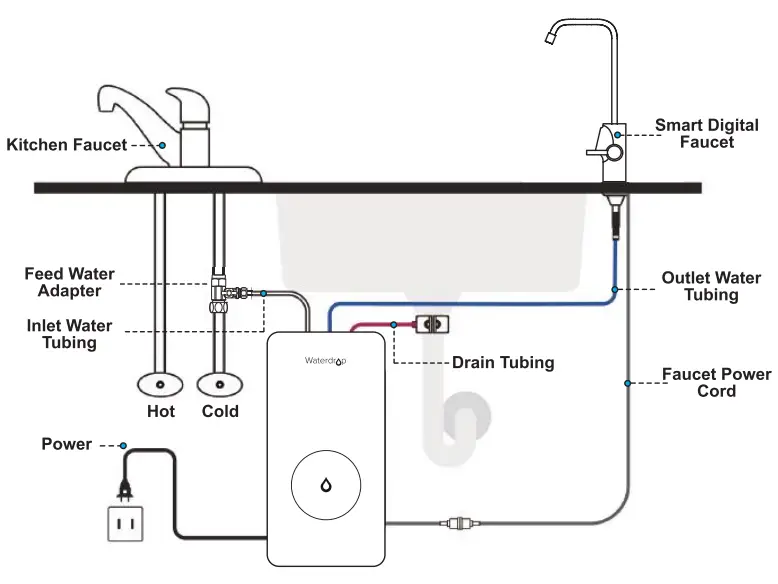
A reverse osmosis system is a wonderful option if you need filtered water. To provide purified water, install a reverse osmosis system under your kitchen sink. You do not need to be a professional to install the Waterdrop systems and you can do it yourself in just a few steps.
These installation procedures apply Waterdrop reverse osmosis systems, including the following models/series:
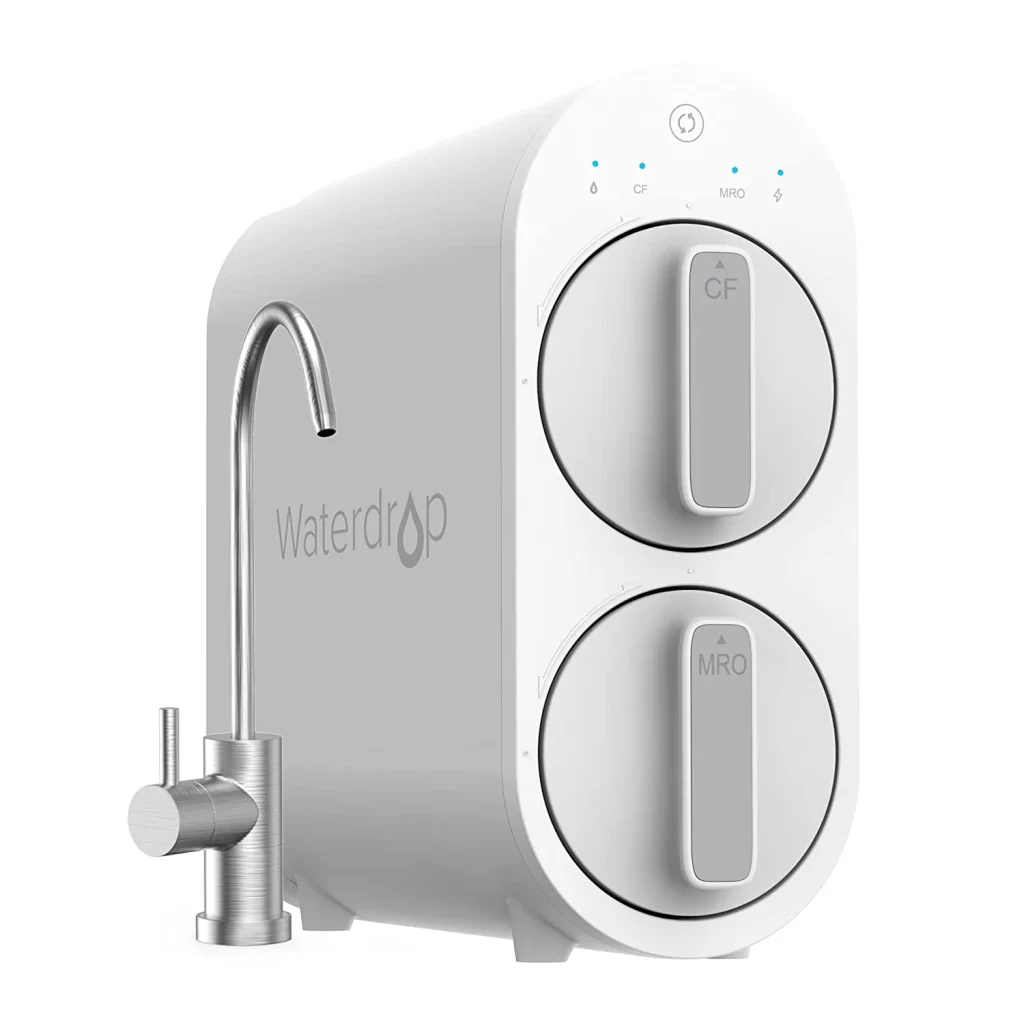
G2 series
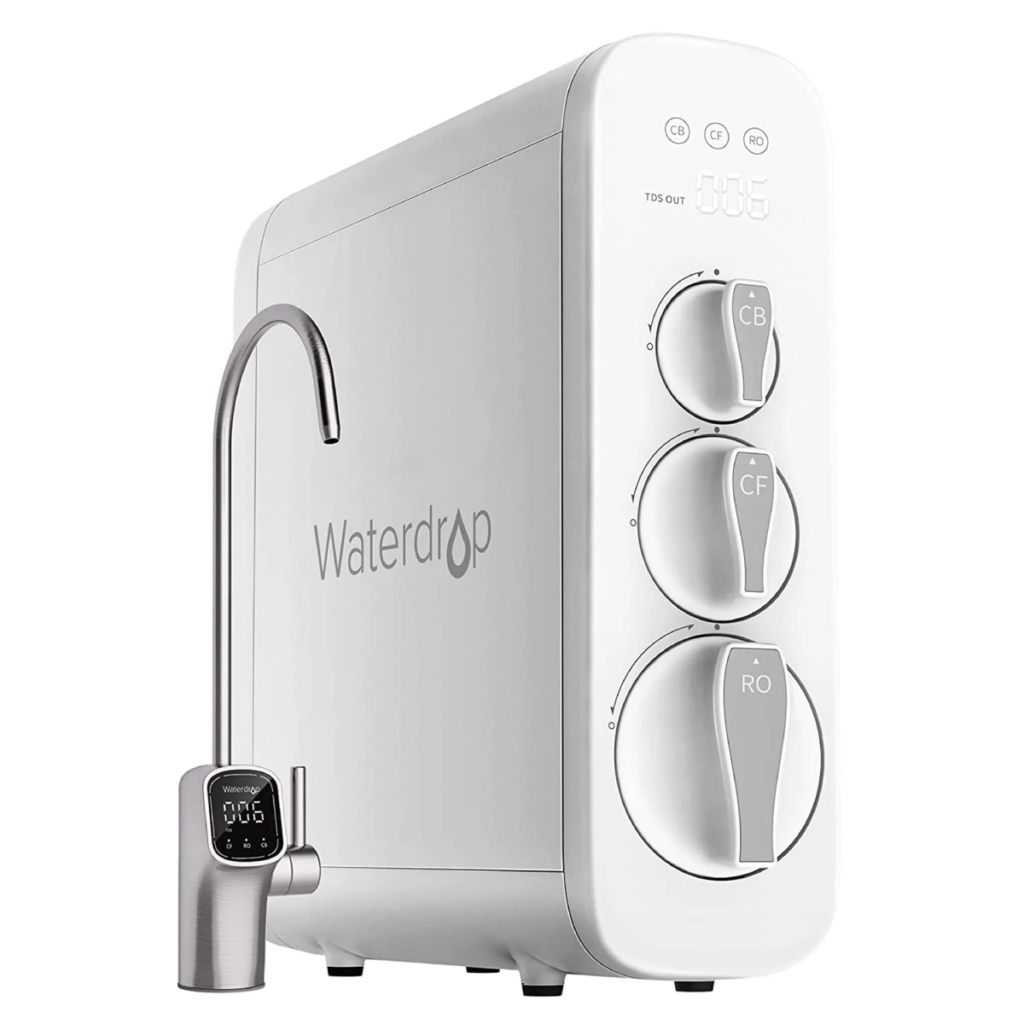
G3 series
D4
D6
N1
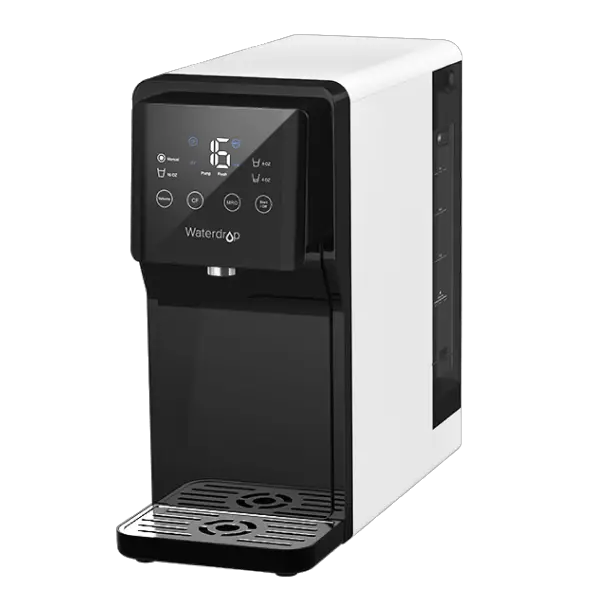
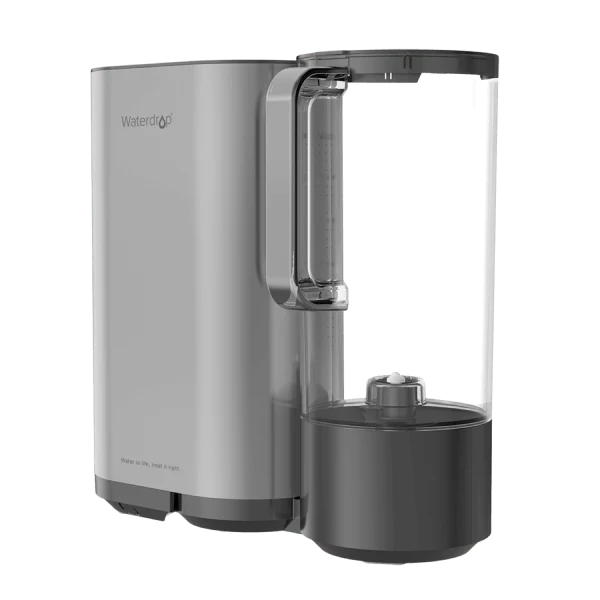
M5
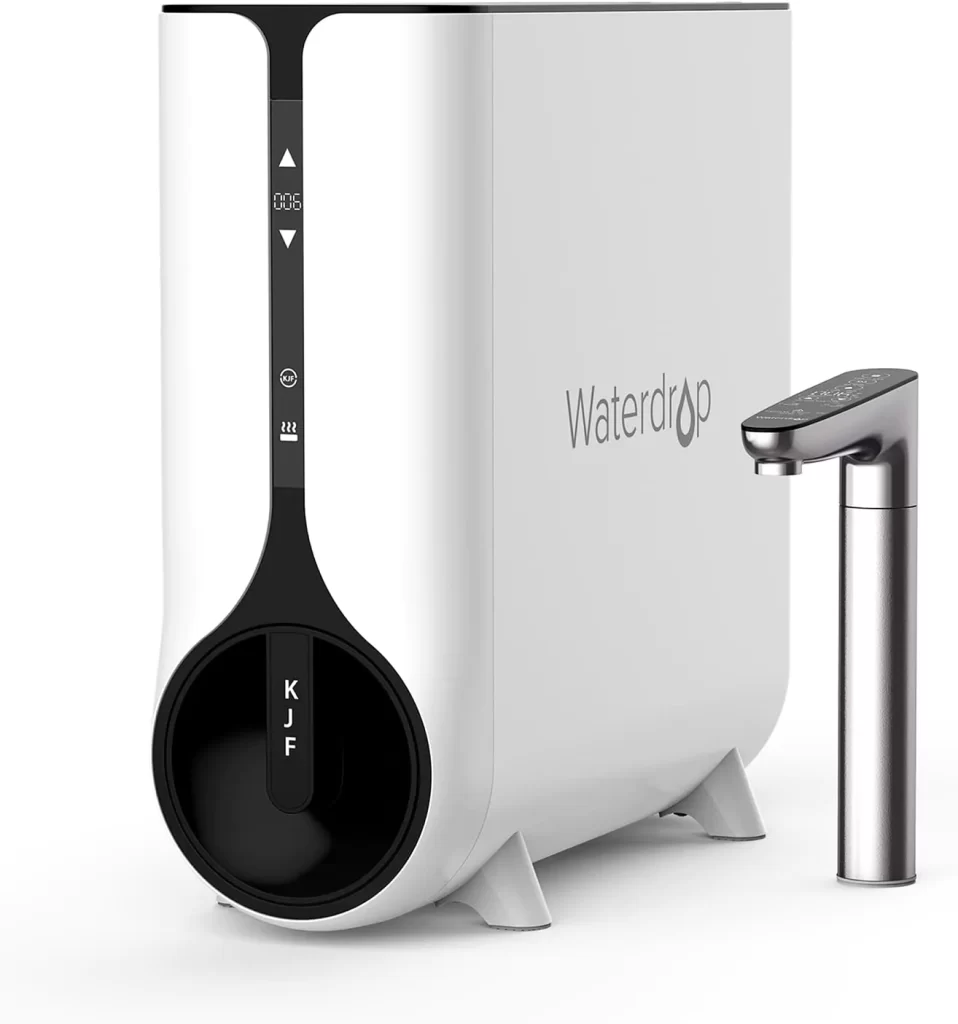
K6
STEP ONE: Gather all the necessary tools.
To begin, collect all of the essential tools for the installation process in one location. You will need:
- adjustable wrench
- screw driver
- drill bit
- variable speed drill
- utility knife
- flashlight
- towel
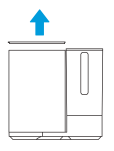
STEP TWO: Unwrap the RO system package.
Unwrap your RO system package and confirm you have all the components required to install your RO system.
In the box, you will find the system housing, an activated carbon filter, pre-sediment, and carbon block filter, Reverse Osmosis membrane filter, an RO faucet, and a drain saddle.
Other things you will find include lock clips, a power adapter, Teflon tape, a feed water adapter, and red and white tubing. After confirming that you have all the necessities, you can now begin your installation.
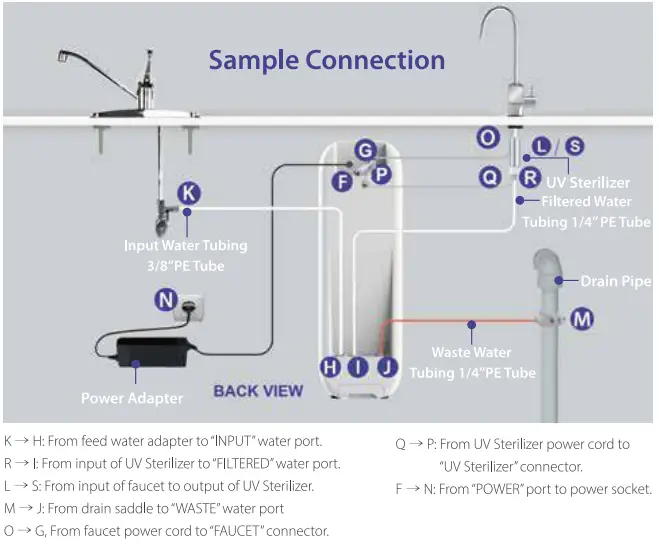
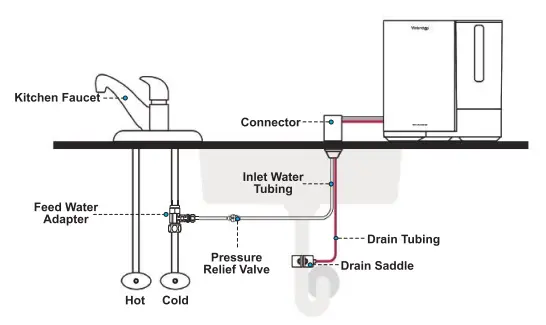
STEP THREE: Install the feed water adapter
- For the G2 series, D4, D6, and M5 systems, use 1/4″ Inlet water tubing to RO system.
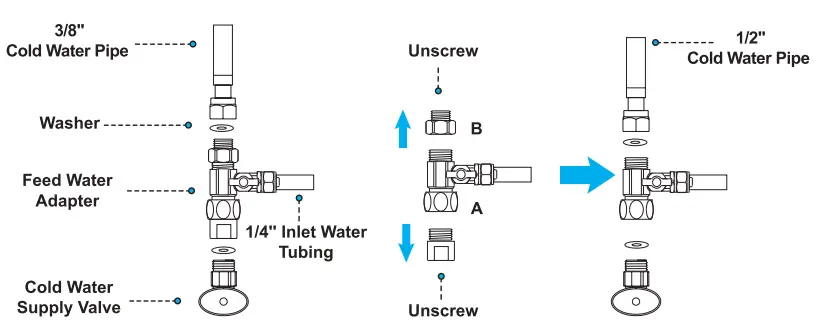
- For G3 series and K6 systems, use 3/8″ (white) inlet tubing to RO system.
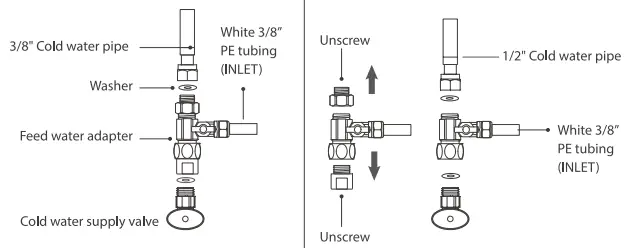
- Shut off the cold water adapter valve and open the kitchen faucet to release pressure.
- Disconnect the cold water pipe from the cold water supply valve.
- Connect the feed water adapter to the cold water supply pipe with its washer and tighten it with the adjustable wrench.
- If the pipe has a half-inch connection, unscrew the two converters from both ends before connecting it to the cold water supply valve and tightening it with the adjustable wrench.
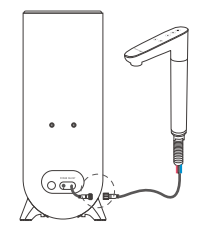
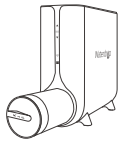
STEP FOUR: Install the faucet
- Note: The N1 and M5 systems do not include a faucet.
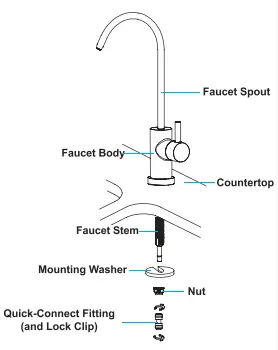
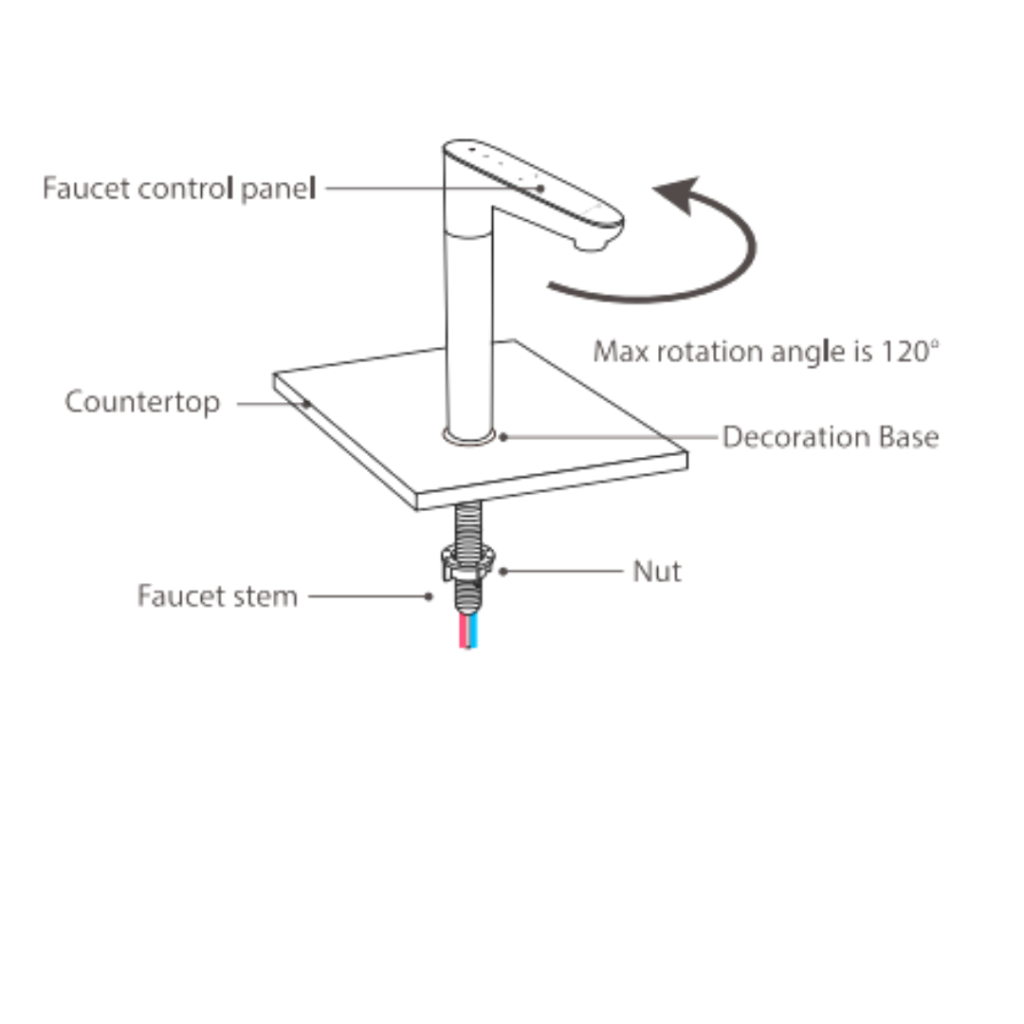
- To begin, place the spout of the faucet into the faucet body.
- Place the faucet stem and power cord (if applicable) in the hole on the countertop.
- Use mounting washer or decorative base (for K6 only).
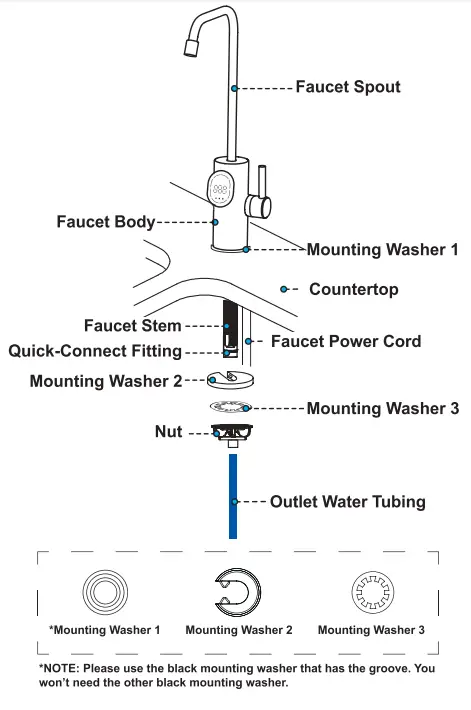
- The D4 and D6 systems have 2-under sink mounting washers (put on washer 2 then washer 3).
- Under the sink, place the mounting washer on the faucet stem, then slip on the nut and tighten it.
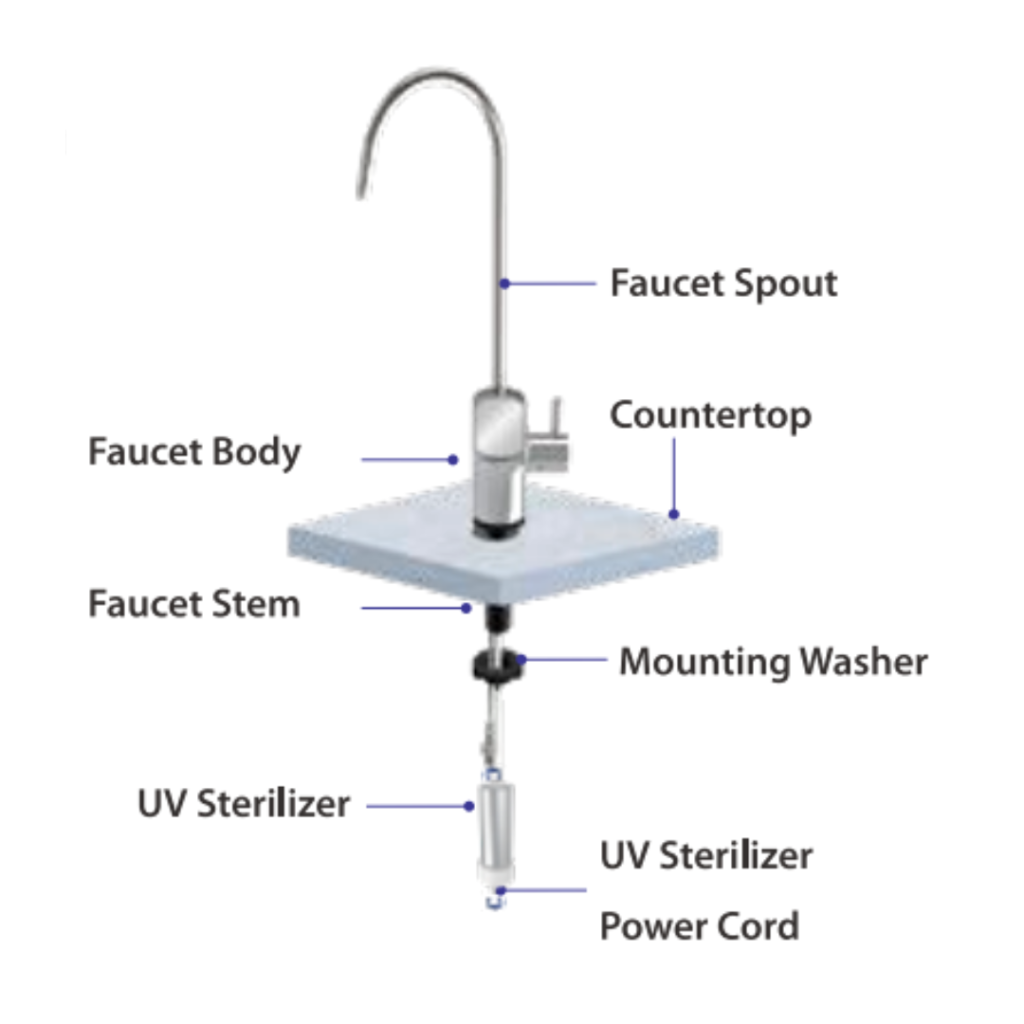
- For the G3-P800 system, fully and firmly press the UV sterilizer’s output onto the faucet stem.
- Secure the fitting using the locking clip.
For the RO M5 system – Install the Connector
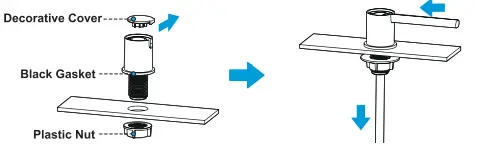
- Drill 1 and 3/8 inch hole in bench if you don’t have one already.
- Force the connector from the bottom of the thread so the decorative cover on top is exposed, then push the decorative cover horizontally to remove it.
- Insert connector into hole with black gasket on countertop side (use a thread extender if your bench is thicker than 1.3″).
- Gently add the plastic nut to the connector thread without tightening.
- Insert INLET and DRAIN tubing into connector.
- Once tubing is in correct place, push it down into the “U” grove in the connector.
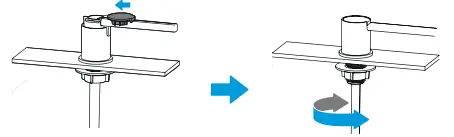
- Put the decorative connector cover back on.
- Gently tighten the plastic nut underneath.
STEP FIVE: Install the drain saddle
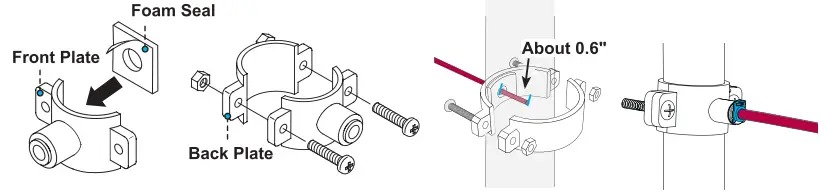
- Choose a point on the vertical drain pipe where you want to drill a quarter-inch hole, but make sure you don’t go through the pipe on the opposite side.
- Remove the front plate and replace it with the waste water tube (red tubing).
- Insert the tubing for about 0.6 inches into the drilled hole.
- Use the towel to wipe away any water that may spill.
- Place the rear plate on the drain pipe and use a screwdriver to evenly tighten the screws and nuts while keeping the tubing in the hole.
- To secure the connection, place the lock clip on the fitting.
Note: On the K6 Instant Hot Water Reverse Osmosis system, the DRAIN water line is gray.
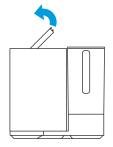
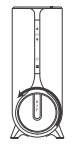
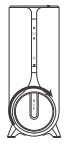
STEP SIX: Position the RO system housing
- Locate a flat surface on which to place the system housing. Confirm there is enough room for the system to be installed.
- To make future replacement and indicator checking easier, position the front panel so that it faces you.
Note: Do not place the housing against the cabinet as there may be vibrations when the system is operating.
STEP SEVEN: Connect tubing
Note: The N1 RO system does not require any tubing connections.
For G2 series systems:
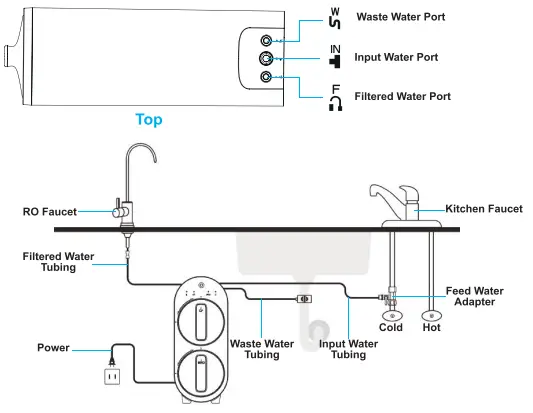
- Locate the system’s water ports. There are three types of ports: INPUT, FILTERED, and WASTE.
- Begin by removing all of the plugs, but instead of pulling them out directly, press and hold the lock sleeve as you take it out.
- If required, cut tubing to the length you need,
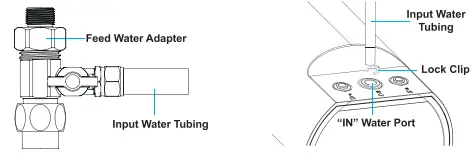
- Let’s begin with the INPUT port. Locate the WHITE 1/4″ tubing on the feed water adapter and insert it in the “IN” water port.
- When through, pop the lock clip.
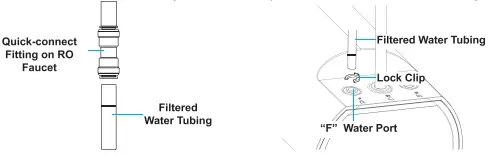
- Then proceed to the FILTERED port. Locate the WHITE 1/4″ tubing coming from the RO faucet and connect it to the “F” water port.
- When it is secure, pop the lock clip.
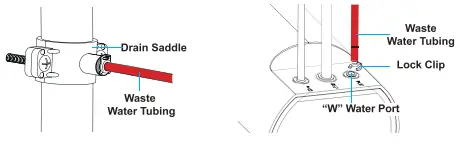
- Third, locate the WASTE port. Locate the RED 1/4″ tubing coming from the drain pipe and connect it to the “W” port.
- When it is secure, pop the lock clip.
For G3 series systems:
- Locate the system’s water ports. There are three types of ports: INPUT, FILTERED, and WASTE.
- Begin by removing all of the plugs, but instead of pulling them out directly, press and hold the lock sleeve as you take it out.
- Let’s begin with the INPUT port. Locate the WHITE 3/8 tubing on the feed water adapter in the INPUT water port and insert it.
- When through, pop the lock clip.
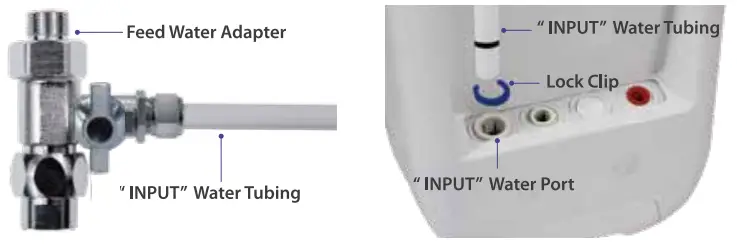
- Then proceed to the FILTERED port. Locate the WHITE 1/4″ tubing coming from the RO faucet and UV sterilizer (if applicable) and connect it to the FILTERED water port.
- When it is secure, pop the lock clip.
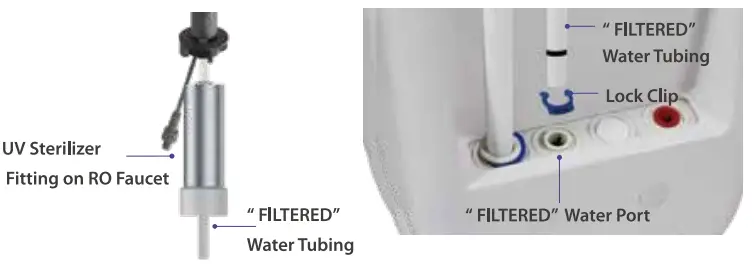
- Finally, locate and insert the RED 1/4″ tubing coming from the drain saddle into the WASTE water port.
- When through, install the lock clip.
Note: All the three tubes have a black mark on them; make sure the tubes are fully inserted until they reach the mark.
For D4 and D6 systems:
- Locate the system’s water ports. There are three types of ports: INLET, OUTLET, and DRAIN.
- Begin by removing all of the plugs, but instead of pulling them out directly, press and hold the lock sleeve as you take it out.
- If required, cut tubing to the length you need,
- Let’s begin with the INLET port. Locate the WHITE 1/4″ tubing on the feed water adapter and insert it in the INLET water port.
- When through, pop the lock clip.
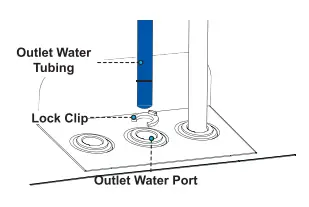
- Then proceed to the OUTLET port. Locate the BLUE 1/4″ tubing coming from the RO faucet and connect it to the OUTLET water port.
- When it is secure, pop the lock clip.
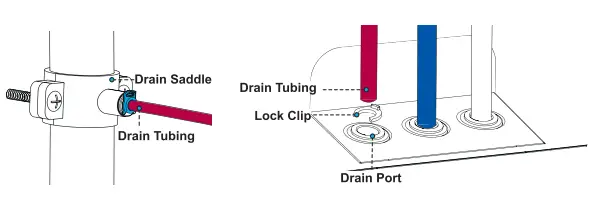
- Third, locate the DRAIN port. Locate the RED 1/4″ tubing coming from the drain pipe and connect it to the DRAIN port.
- When it is secure, pop the lock clip.
For M5 systems:
- Locate the system’s water ports. There are two types of ports: INLET, and DRAIN.
- Begin by removing the plugs from the bottom of the RO system. Instead of pulling them out directly, press and hold the lock sleeve as you take it out.
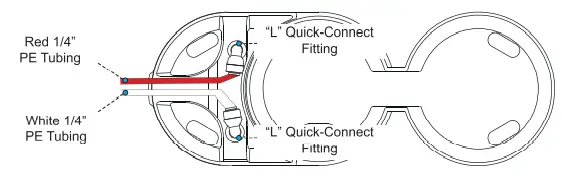
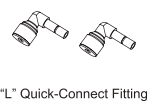
On both the INLET and DRAIN ports, connect the “L” Quick-Connect Fittings.
- Let’s begin with the INLET port. Locate the WHITE 1/4″ tubing coming from the feed water adapter and via the pressure relief valve and connect it to the quick-connect fitting – insert firmly.
- When you reach the mark on the tubing, pop the lock clip.
- Add the pressure relive valve to the INLET water tube (under the sink) somewhere where it won’t get in the way.
- Cut tubing and insert firmly into both ends of the pressure relief valve while ensuring the flow arrow on the relief valve points towards the Reverse Osmosis system and NOT the feed water adapter.
- Proceed with the OUTLET port and locate the RED 1/4″ tubing that joins the drain pipe and securely connect it to the OUTLET quick-connect fitting – insert firmly.
- When it is secure, pop the lock clip.
For K6 systems:
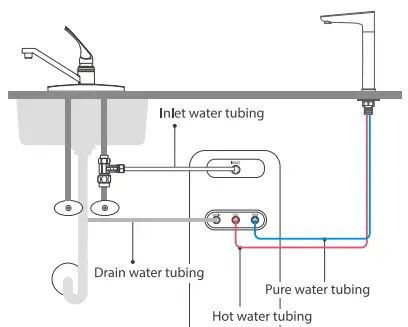
- Locate the system’s water ports. There are four types of ports: INLET, PURE, HOT, and DRAIN.
- Begin by removing all of the plugs, but instead of pulling them out directly, press and hold the lock sleeve as you take it out.
- If required, cut tubing to the length you need,
- Let’s begin with the INLET port. Locate the WHITE 3/8″ tubing on the feed water adapter and insert it in the INLET water port (white water port).
- When through, pop the lock clip.
- Then proceed to the PURE port. Locate the BLUE 1/4″ tubing coming from the RO faucet and connect it to the PURE water port (blue water port).
- When it is secure, pop the lock clip.
- Third, locate the HOT port. Locate the RED 1/4″ tubing coming from the RO faucet and connect it to the HOT port (red water port).
- When it is secure, pop the lock clip.
- Finally, locate the DRAIN port. Locate the GRAY 1/4″ tubing coming from the drain pipe and connect it to the DRAIN port (gray water port).
- When through, install the lock clip.
STEP EIGHT: Connect smart display faucet power cord
Jump to STEP NINE if you have a regular faucet.
- If your system has a smart display faucet (e.g. D6, K6, G3P800 systems), first connect the RO smart faucet to the system before connecting the power cord. In order to do so, insert the power cord from the RO faucet into the faucet connector and tighten the nut.

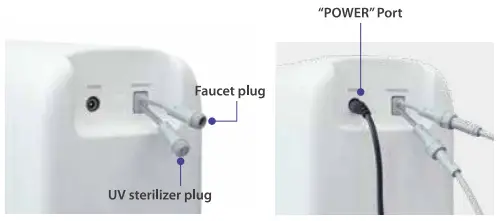
- If your RO system entails the UV sterilizer plug, you can also connect the UV sterilizer into the system. To do so, place the power cord from the UV sterilizer into the UV sterilizer connector and tighten the nut.
- Connect the power adapter by inserting the DC head of the power adapter into the power port at the back of the housing to complete the connection.
- Lastly, insert the power plug into the socket and turn it on.
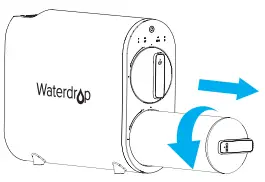
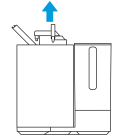
STEP NINE: Install the filters
Waterdrop Reverse Osmosis systems have either one, two or three filters.
- Remove the protective cap and shrink wrap on the filter.
- Install filters in the housing one by one – if you are replacing an old (used) filter go here.
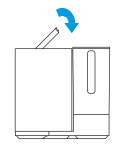
- For model/series D4, D6, and M5, the filters have a handle to make it easier to feed into place.
- For model/series G2, G3, N1, and K6, filters have locking pins at their base and require a quarter turn clockwise (90 degrees) to fix them into place.
STEP TEN: Start up the system
- Turn on the cold water supply valve and feed water adapter to check for leaks.
- Ensure you have connected the power socket, if you haven’t done so already.
- Proceed with flushing the filters.
How do you flush a Waterdrop RO system?
You will need to flush waterdrop filters after first installation of the RO system or after replacing spent filters. If you have replaced a filter, you only need to flush that particular filter – not all filters.
For G2 series systems:
- The CF filter requires you turn on the RO faucet for 5 minutes and the MRO filter requires the RO faucet to be on for 30 minutes. Stop flushing when the filtering indicator stops flashing and is a permanent blue.
For G3 series systems:
- The CF filter will flush automatically for 5 mins.
- When the flush is finished, the three indicator lights will turn off.
- Turn on the RO faucet for 15 mins (to flush the CB filter) or 30 mins (to flush the RO filter). When finished, the TDS reading will appear on the screen.
For D4 and D6 systems:
- Hold power button for 3 seconds until indicator light comes on and you hear a “ding” sound. The system and filters will flush automatically, during which time the power and reset button will flash alternately for ~25 seconds (total time = 1 minute).
- After flushing, press the reset button for 3 seconds until you hear a “ding” sound again and the indicator light will stop flashing.
- Replace front cover.
- Run faucet for 20 minutes until water is clear.
For N1 systems:
- The CF filter will flush automatically for 5 mins – when you see L1 on display, change the water in the feed tank.
- The MRO filter will flush automatically for 15 minutes with the “flush” indicator constantly flashing – when you see the “pump” indicator light go out, put a >51oz container below the spout and press the start/off button until it goes out. You may need to repeat flushing 2 or 3 times until water looks clear.
For M5 systems:
- Turn on feed water adapter.
- The system will automatically filter water until the tank is full. You may notice some black water in first tank filling – this is normal.
- Discard the first 4 tanks worth of water and if the 5 tank looks clear it is ready for drinking.
- Note: Upon first use of the system, tank filling will be delayed for roughly 1.5 minutes to allow enough pressure to build up behind the RO membrane.
For K6 systems:
- The filter will flush automatically for 1 minute after resetting the filter indicator (hold filter reset button for 5 seconds until you hear a beep and the filter indicator light will be blue).
- Once the cold water button on the smart faucet starts flashing (water drop symbol), touch the cold water button to flush filter for 15 minutes.
- Once the faucet stops delivering water, the flushing processes is complete.
How to change a filter on a Waterdrop RO system
The filter life varies based on the quality of the source water and the amount of water used, and for that reason, the filters should be replaced according to the filter life indicator.
For G2 series systems:
- Keep power and water supply on.
- Twist the used filter in a counterclockwise direction to remove it.
- The CF filter is short so hold it with two hands, so it doesn’t drop out.
- Remove wrapping and plastic cap on new filter(s).
- Place the new filter in the correct hole and align arrow with empty circle on the housing.
- Turn it clockwise for 90 degrees – arrow should be aligned with solid circle on housing. If it clicks, it’s secure.
- When you’re finished, make sure to reset the indicator by holding the reset button to select the CF or MRO filter until it flashes.
- Once the correct filter indicator light is flashing (representing the corresponding filter that you changed), hold the reset indicator again for 5 seconds until you hear a beep, and the filter life indicator will be blue.
- Flush the changed filter – the CF filter requires you turn on the RO faucet for 5 minutes and the MRO filter requires the RO faucet to be on for 30 minutes. Stop flushing when the filtering indicator stops flashing and is a permanent blue.
For G3 series systems:

- Keep power and water supply on.
- Turn off faucet and wait 30 seconds to release internal RO pressure.
- Twist the used filter a quarter turn (90 degrees) in a counterclockwise direction to remove it.
- If you are replacing the CB or CF filters, press the center knob as it protrudes from the top of the old filter as you release pressure to avoid spills.
- After removing the wrapping and plastic cap on the new filter, place it in the correct hole and turn clockwise.
- When you’re finished, make sure to reset the indicator by holding the filter light (representing the corresponding filter that you changed) for 7 seconds until you hear a beep.
- Flush the changed filter – the CF filter will flush automatically for 5 mins. Turn on the RO faucet for 15 mins (to flush the CB filter) or 30 mins (to flush the RO filter).
For D4 and D6 systems:
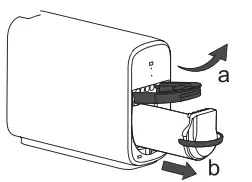
- Turn off water supply and turn the faucet on.
- Turn the power off (press power button for 3 seconds)
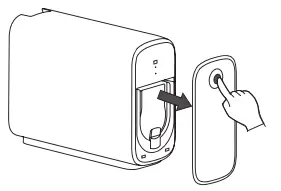
- Press power button to lift the front cover off.
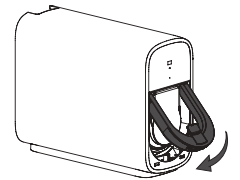
- Pull locking handle out and up (a) and use filter handle to remove used filter (b).
- Remove wrapping and plastic cap on new filter.
- Insert new filter and push locking handle down – you should hear a snap as it locks into place.
- Hold power button for 3 seconds until indicator light comes on and you hear a “ding” sound. The system and filters will flush automatically, during which time the power and reset button will flash alternately for ~25 seconds (total time = 1 minute).
- After flushing, press the reset button for 3 seconds until you hear a “ding” sound again and the indicator light will stop flashing.
- Replace front cover.
- Run faucet for 20 minutes until water is clear.
For N1 systems:
- Open tank cover.
- Remove feed water tank.
- Open top cover on system.
- Twist the used filter in a counterclockwise direction 90 degrees to remove it.
- Remove wrapping and plastic cap on new filter.
- Place the new filter in the corresponding hole and turn it clockwise.
- Close top cover on system, replace water in feed tank, close tank cover.
- Reset filter life indicator by holding the correct filter light (representing the corresponding filter that you changed) for 5 seconds until you hear a beep.
- Flush the changed filter.
- The CF filter will flush automatically for 5 mins – when you see L1 on display, change the water in the feed tank.
- The MRO filter will flush automatically for 15 minutes with the “flush” indicator constantly flashing – when you see the “pump” indicator light go out, put a >51oz container below the spout and press the start/off button until it goes out. You may need to repeat flushing 2 or 3 times until water looks clear.
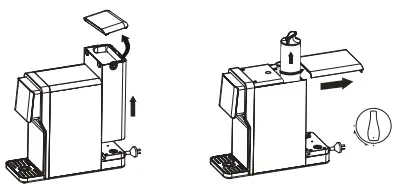
For M5 systems:
- Remove cover plate.
- Lift locking handle.
- The filter has a handle, which you can use to lift it out.
- Put the new filter in and press the locking handle downward – you should hear a snap sound
- Put cover plate back on.
- Remove feed water tank.
- Reset filter life indicator – they last approximately 12 months.
- Turn on feed water adapter.
- Discard the first 4 tanks worth of water.
For K6 systems:
- You can keep power and water supply on while changing the filter.
- Turn off faucet and wait 30 seconds to release internal pressure.
- Twist the used filter a quarter turn (90 degrees) in a counterclockwise direction to remove it.
- After removing the wrapping and plastic cap on the new filter, place it in the filter barrel with the handle perpendicular to the display bar.
- Turn it clockwise a quarter turn (90 degrees) until it aligns with the display bar.
- When you’re finished, make sure to reset the indicator by holding the filter reset button for 5 seconds until you hear a beep – the filter indicator light will turn blue.
- Flush the changed filter – the filter will flush automatically for 1 minute. Once the cold water button flashes, touch the cold water button to flush filter for 15 minutes – once the faucet stops delivering water, the flushing processes is complete.
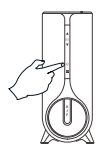
To reset the indicator
Water Purification Guide has comprehensive instructions on how to reset the filter light on ALL Waterdrop RO systems available here.
In summary, press and hold the respective filter indicator or reset button for 3-7 seconds until the system beeps.
| System | Duration – button |
| G2 | 5 seconds – reset button |
| G3 | 7 seconds – filter indicator |
| D4 | 3 seconds – reset button |
| D6 | 3 seconds – reset button |
| N1 | 5 seconds – filter indicator |
| M5 | no reset buttons |
| K6 | 5 seconds – filter indicator |
Note: The indicator light button will be the CF, CB, RO, MRO or KJF button, but this depends on which you are replacing.
Waterdrop error codes and how to fix them
When there is a problem with your Waterdrop RO system, the machine will typically give you an alert and a malfunction indicator light and/or an error code may be displayed.
Note: The D4 and M5 RO system do not display error codes.
For G2 series systems:
Beeping for 3 minutes – CF & MRO indicators flashing RED.
After 30 minutes of continuous operation, the system will start beeping for 3 minutes. After this, the system will stop making water. The CF and MRO filters indicator lights will also be flashing red letting you know that it is overworked.
How to fix it:
- Unplug and replug the devise.
CF & MRO indicators flashing PURPLE.
This is a reminder that the booster pump has been frequently starting and stopping.
After 20 minutes of the booster pump frequently starting and stopping the CF and MRO filter indicators will flash purple. The system will also stop making water and the filtering indicator and power indicator lights will be off.
How to fix it:
- Unplug and replug the devise.
For G3 series systems:
E01
The error code E01 on the waterdrop RO system indicates that there is a water shortage. It is always accompanied by a buzzer that sounds 3 times. When inlet water pressure returns to normal, and the water shortage reminder disappears, the system will automatically return to normal.
How to fix it:
- Check the filter life indicators to see which filters need to be replaced and replace them as soon as possible.
- Check to see if the water pressure is between 14.5 and 87 pounds per square inch.
- Turn on the water supply valve or the feed water adaptor.
- Reinstall the three filters and double-check that they’re in the right places.
- Check all tubing for crimps and remove them.
E02
The error code EO2 on the waterdrop RO system indicates that there is an inside water leakage. The buzzer will also keep beeping.
How to fix it:
- To find the leak, inspect all joints, fittings, and tubing connections. Ensure that the filters are appropriately placed.
- Check the water container in the back to see if it has any water and if this is the case, clean the container and reinstall it.
E03
The error code E03 on the waterdrop RO system means that the booster pump is overworked due to a leak in the tubing connection between the system and the RO faucet. The system will need to be powered on again to recover.
How to fix it:
- Turn off the electricity.
- Check the tubing connection.
- Make sure the tubing is securely and firmly placed into the quick-connect fitting.
- Turn the system back on.
E04
The E04 error code on the RO systems is caused by the booster pump starting and frequently stopping due to an imbalance in internal pressure.
How to fix it:
- Turn off the power.
- Remove all the tubing crimps and completely turn off the RO faucet.
- Make sure the faucet isn’t clogged, then turn the system back on.
For D6 systems:
E6
After 40 minutes of continuous operation, the system will protect itself and go into standby and display the E6 error code on the faucet.
How to fix it:
- Press power button for 3 seconds – filter indicator will turn off.
- Press power button again for 3 seconds to restart system – flushing will automatically occur for 25 seconds.
E9
The E9 error code is displayed on the smart faucet (D6 system) if the faucet is turned on but does not receive the correct information for 5 seconds – It will make the system go into standby mode after 1 minute.
How to fix it:
- Check the faucet plug is plugged in properly and not lose.
- Also check to see if the cord is damaged – if it is, contact Waterdrop customer support.
EA
An “EA” error code will show on the smart faucet if the Total Dissolved Solids (TDS) display is abnormal.
How to fix it:
- Unplug the power, wait 5-10 seconds, and plug it in again.
- Contact Waterdrop customer support if problem continues.
For N1 systems:
E6
After 40 minutes of continuous operation, the system will protect itself and go into standby and display the E6 error code and you will hear an alarm 5 times.
How to fix it:
- Unplug and replug the devise.
- Contact Waterdrop customer support if problem continues.
L1
If your N1 reverse osmosis system displays “L1” it can mean either:
- The water quality of the filtered water is poor, and the TDS is higher than 99ppm, OR
- The feed water tank is low on water.
How to fix it:
- Complete a water change of the feed water tank.
- Also ensure the feed water tank is in its correct position, otherwise the system will not be able to filter water properly.
For K6 systems:
E02
The error code EO2 on the K6 waterdrop RO system indicates that there is an interior water leakage. You will also hear a buzzer 3 times before the machine will stop heating.
How to fix it:
- Turn off feed water adapter so more water doesn’t enter the system.
- Unplug the power supply and contact Waterdrop customer support.
E03
After 30 minutes of continuous operation, the system will show the E03 error code, and you will hear a buzzer 5 times before the machine stops heating.
How to fix it:
- Check for water leakage which could cause it to work continuously. Do this by inspecting all joints, fittings, and tubing connections.
- If there are no leaks, then unplug and replug the devise.
E05
Error code E05 means the system has been heating water for an extended period of time. You will also hear a buzzer 5 times and the machine stops heating.
How to fix it:
- Attempt to restart heating by pressing the heating button.
- If you then see the E05 error code, contact Waterdrop customer support.
E06
An E06 error code coupled with a buzzer ringing 5 times means the temperature of the heating tank is abnormal. The machine will also stop heating. This typically occurs if the heating sensor is damaged.
How to fix it:
- Turn the system off and on again. If the problem persists, contact Waterdrop customer support.
E07
An E07 error code displays and the buzzer rings 5 times if the heating tank is empty.
How to fix it:
- Turn the system off and on again.
- After powering on, the heating tank should automatically fill for ~3 minutes.
E08
The E08 error code and the buzzer ringing 5 times means an abnormal water flow. This occurs because there is no water feeding through the system and the flow of water through the tubing is inhibited.
How to fix it:
- Power off the system.
- Check all tubing for any kinks, crush or pinch points.
- Restart the system.
Conclusion
Reverse osmosis filtration systems are the most effective in removing a substantial percentage of pollutants from water, including potentially hazardous microorganisms. As discussed above, if you follow the offered instructions, installing the RO system is simple.
Buy Waterdrop Reverse Osmosis Replacement Filters
New Filters can be purchased directly from Waterdropfilter.com – always use genuine parts to ensure optimum filtration.
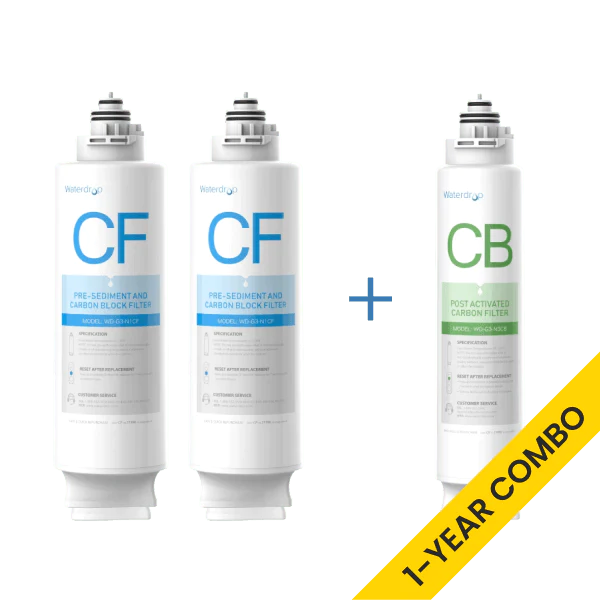
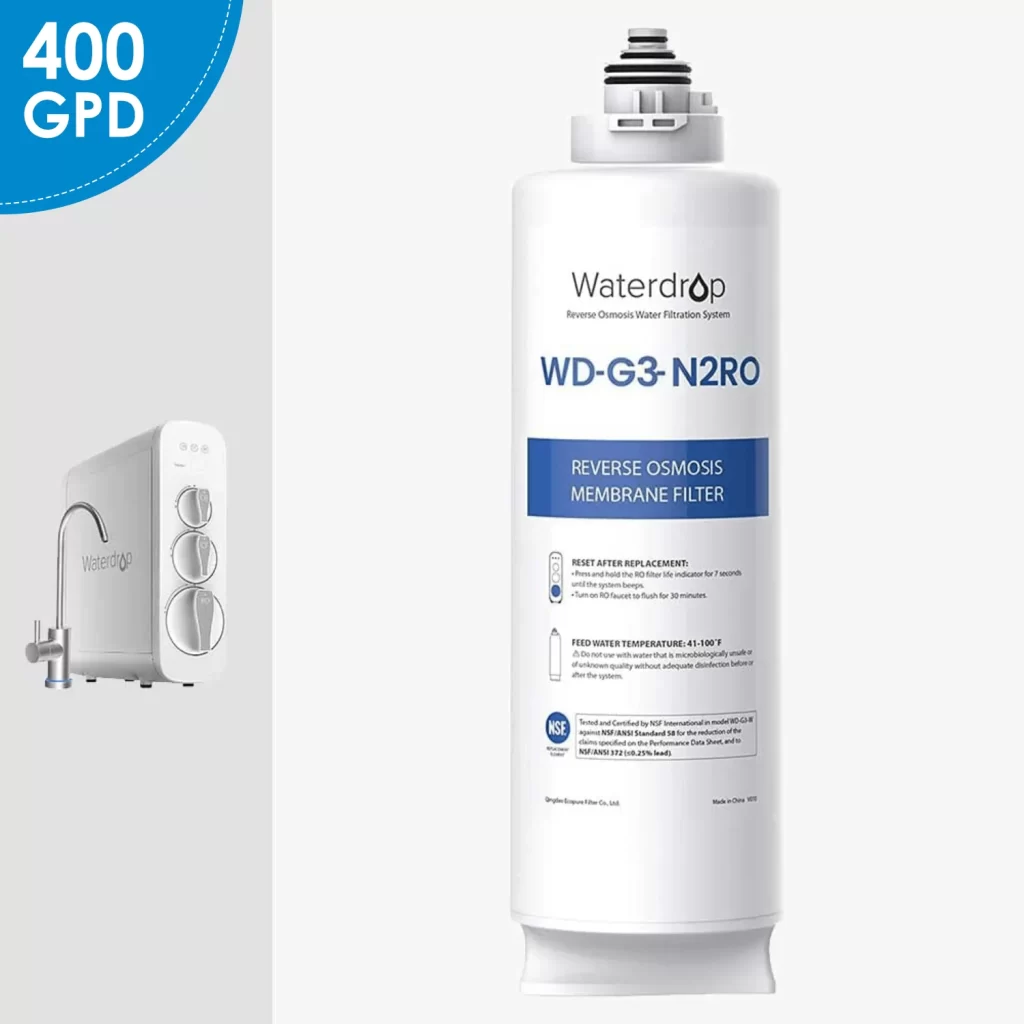
WD-G3-N3CB Filter for waterdrop G3P800 & G3 Reverse Osmosis System
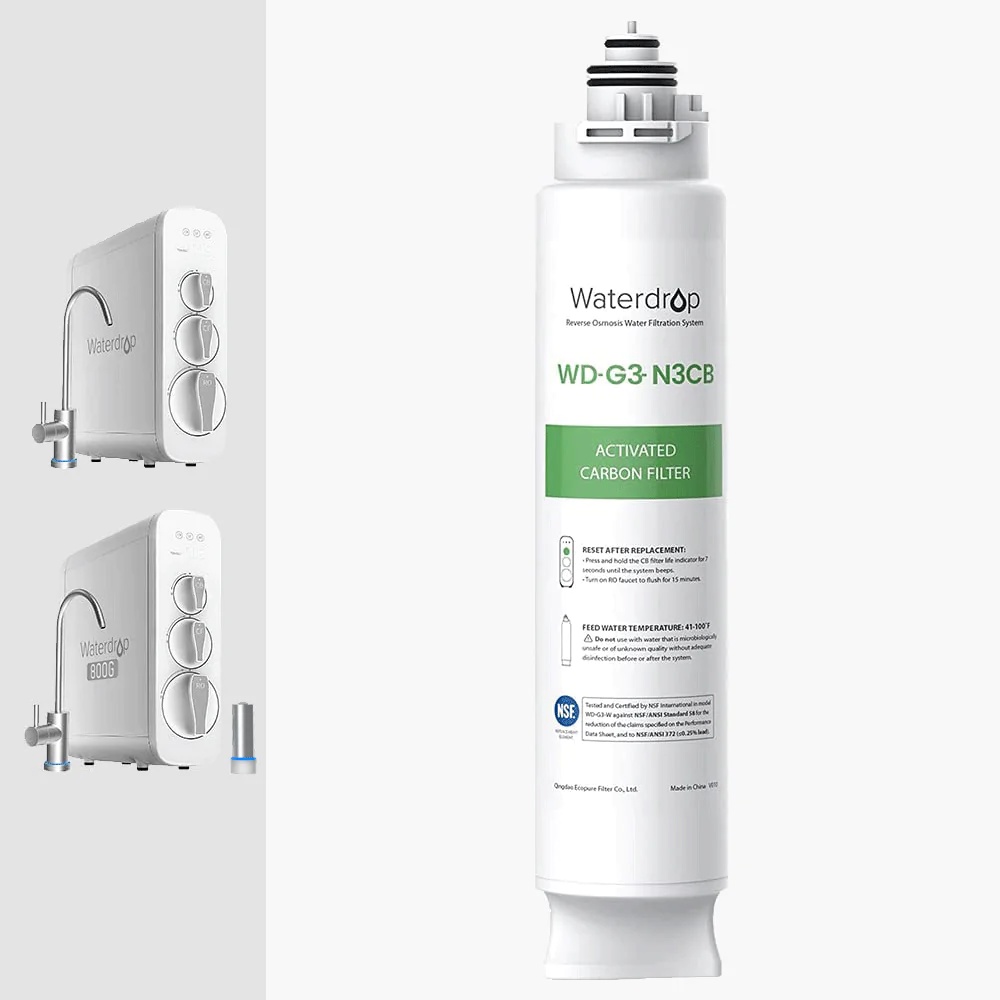
CB Filter Replacement for G3P800 & G3
WD-G3P800-N2RO Filter for Waterdrop G3P800 Reverse Osmosis Systems | 800GPD
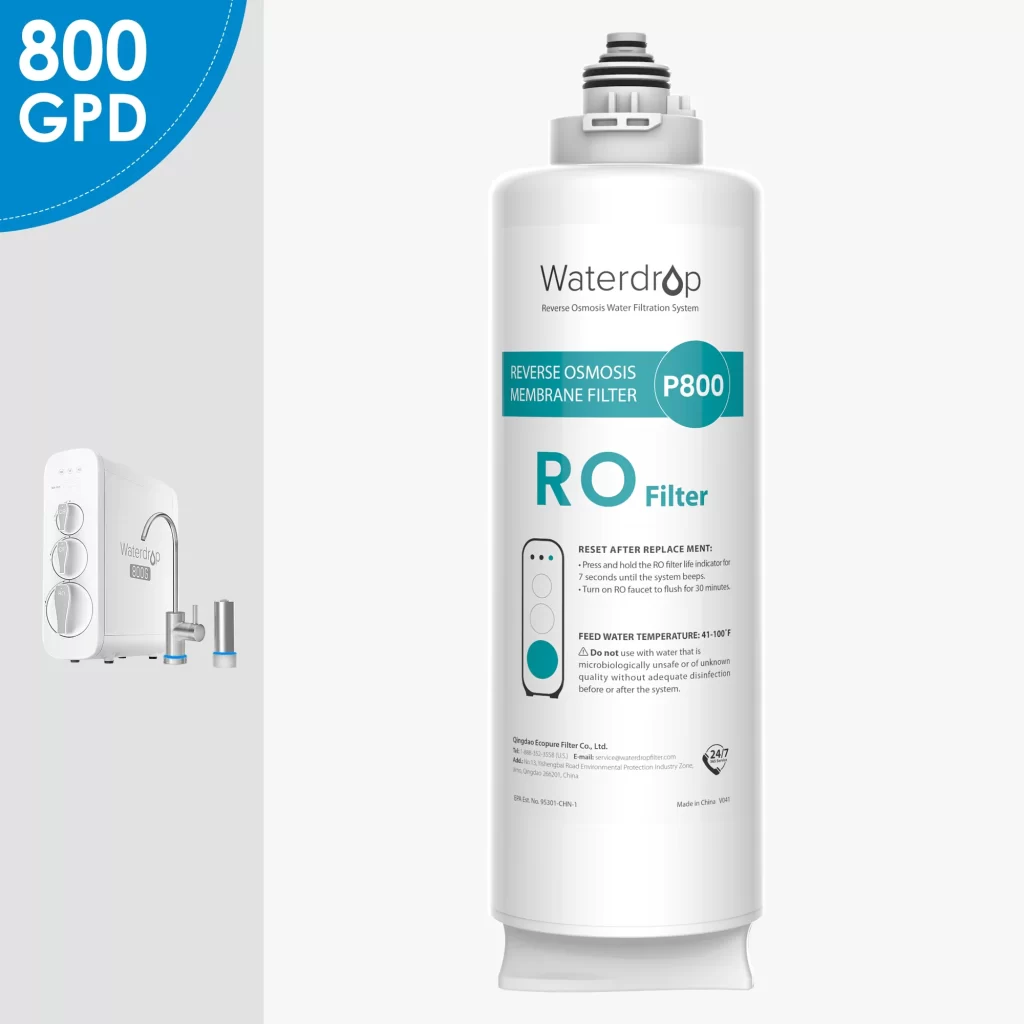
N2RO Filter Replacement for G3P800
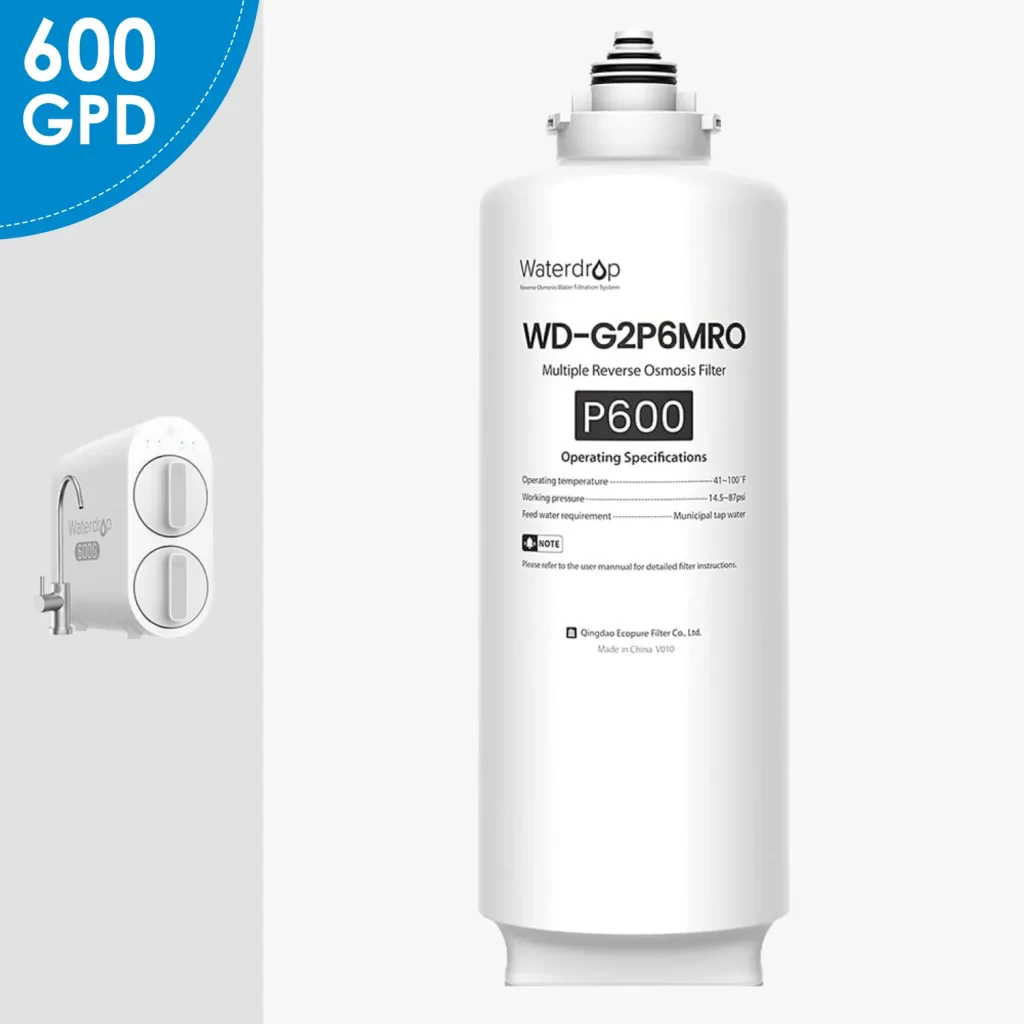

Remineralization Filter for All Series Waterdrop Reverse Osmosis Systems-Waterdrop MNR35
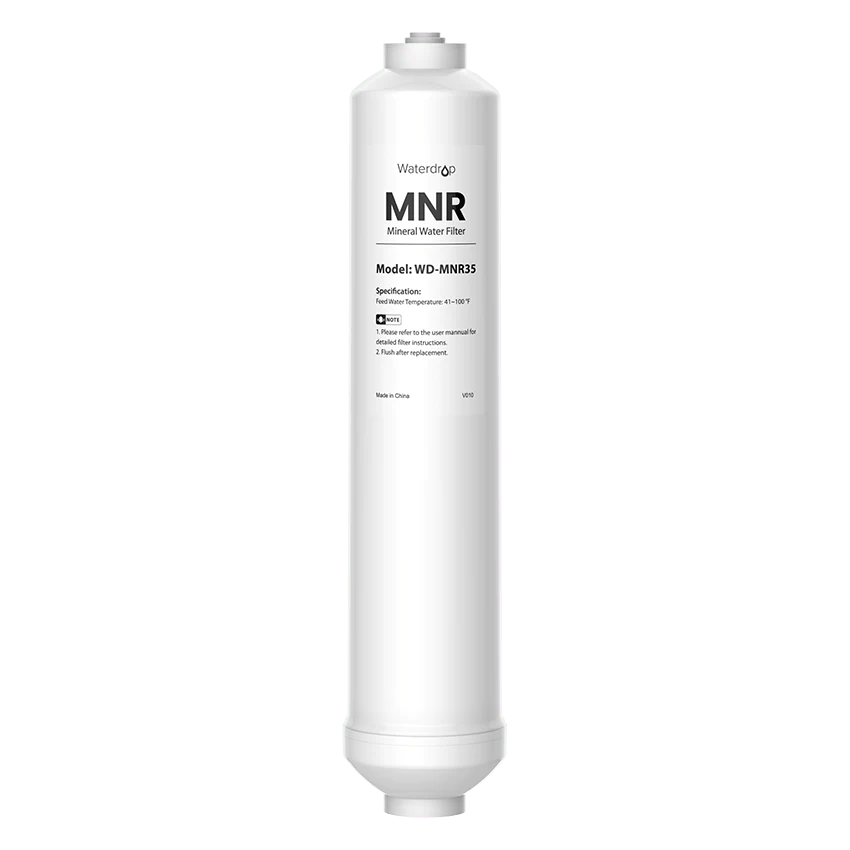
MNR Replacement Fit for G2 G2MNR, G2P600, G3, G3P800, D4, D6.
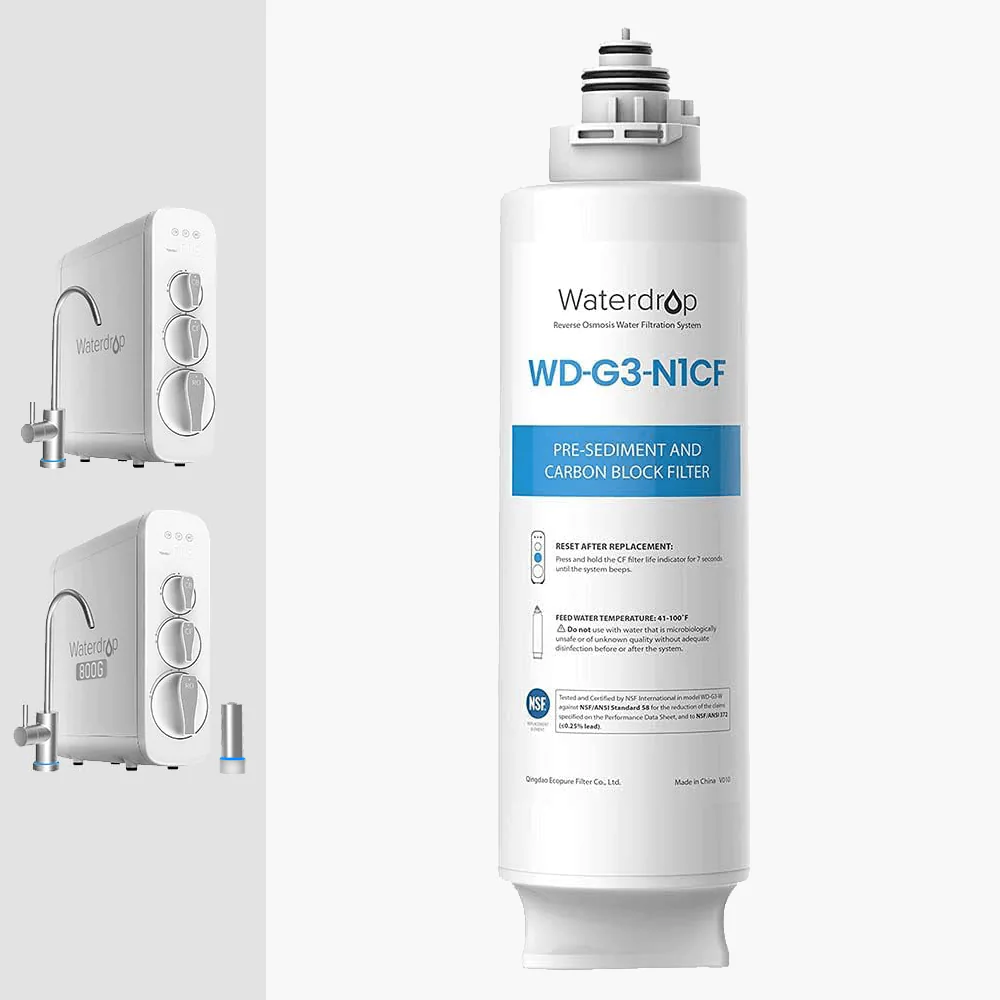
WD-N1-CF replacement for waterdrop WD-N1-W countertop ro water filtration system

CF Filter Replacement for N1
WD-N1-MRO replacement for waterdrop WD-N1-W countertop ro water filtration system
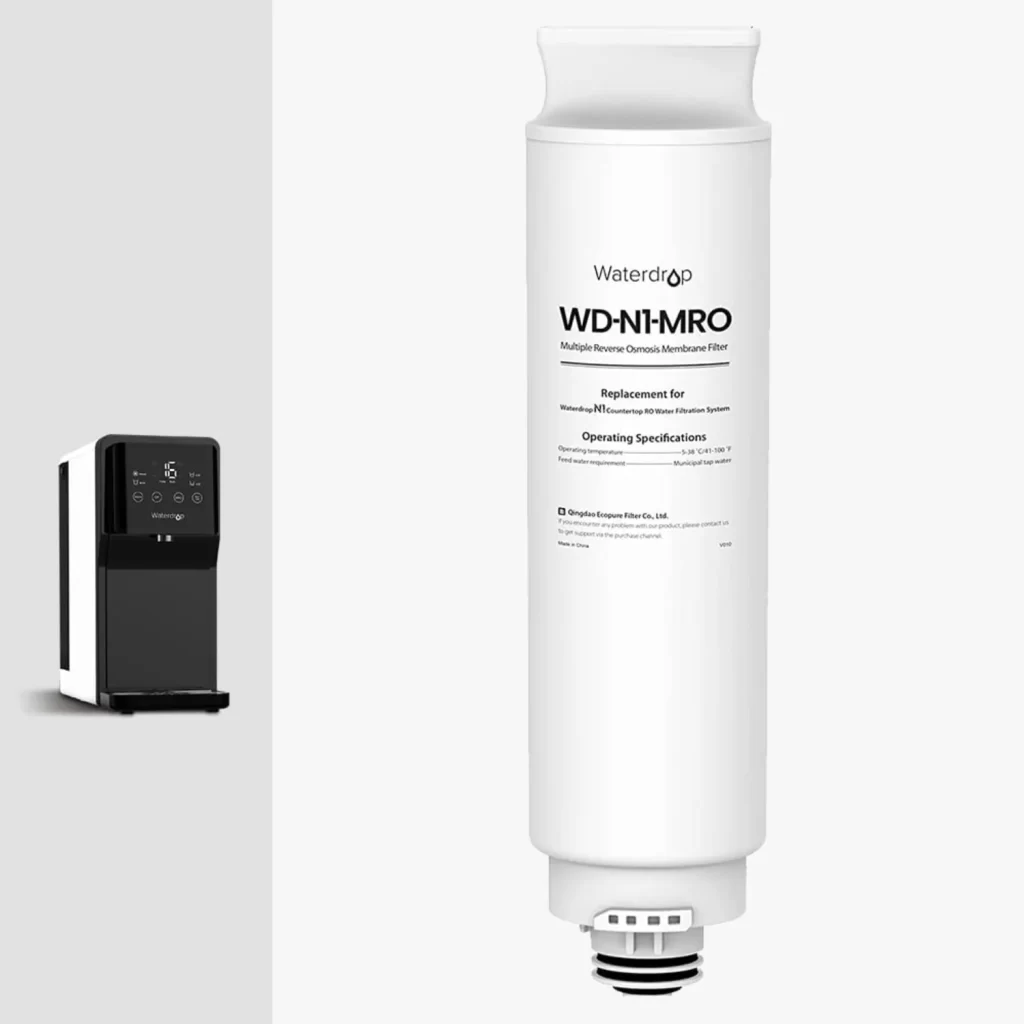
MRO Filter Replacement for N1