
A reverse osmosis system usually blinks red because it needs a filter replaced or needs to be reset. Poor water quality, or in some cases dead batteries in the filter life indicator can also cause a reverse osmosis system to flash red.
Many people use reverse osmosis as a purification method to remove contaminants from their drinking water. However, during use a reverse osmosis system can begin to blink red, signalling a problem that needs fixing.
This post will take you through all the reasons why a reverse osmosis is blinking red, explain how to check for each issue and more importantly, provide step-by-step instructions to solve each problem.
- The filters or RO membrane needing replacement is the leading cause of reverse osmosis lights flashing red.
- A solid red light usually indicates poor water quality.
- Once the problem is solved, the reverse osmosis system will need to be reset for the red light to turn off.
Reasons why your reverse osmosis system is blinking red
There are four main reasons why a reverse osmosis system could be blinking red.
Due to brand similarity, many of the blinking red causes covered in this article apply to other RO (Reverse Osmosis) systems. This guide is generalized but the following brands are used in this article to give more specific and detailed examples;
- Waterdrop G3.
- Frizzlife.
- APEC.
- iSpring.
- Whirlpool.
- GE.
1. Time to change the filters
The number one reason a reverse osmosis system blinks or flashes red is that it needs new filters.
A reverse osmosis system will blink red even when only one of its filters needs replacement. It does not necessarily wait until all the filters are clogged before blinking red.
This is because a reverse osmosis system has several filters and each filter can have its own filter life.
Thankfully, the majority of manufacturers make it quite clear in their user manuals how often a reverse osmosis system needs maintenance and filter changes.
For example, according to the manufacturer’s user manual and handbook, Kent prefilter, sediment, and carbon filters should be changed every six months. Waterdrop advises changing filters every three months, APEC every six to twelve months, and iSpring every twelve months.
If you have lost your manual (many are now available online) most reverse osmosis systems also have the filter change reminder indicator that will let you know if a specific filter replacement is necessary.
Although, filter life varies depending on the quality of the source water, pH, water hardness and the amount of water consumed. So, do not solely rely on these recommendations.
Filters that are clogged also need to be replaced, and when this is not done, the effectiveness of the system drops dramatically.
Looking at the filter replacement indicator is the best way to ensure that the filters are replaced on schedule and as needed. So, if your system is blinking red, check when each filter was last replaced and compare it with the system’s requirements.
Signs your RO system needs new filters
- A blinking red light(filter replacement indicator).
- The system becoming slower than usual.
- The RO system is not filling up with water.
- May produces cloudy water.
How to fix it
- Replace the filters as soon as the red filter replacement light illuminates.
- Check the user manual for your specific model to check light indicator meanings (your system may have several lights).
- Schedule regular maintenance (to prevent filters from clogging).
If you have an APEC RO system and it is also leaking, Water Purification Guide has more information to help you fix it available here.
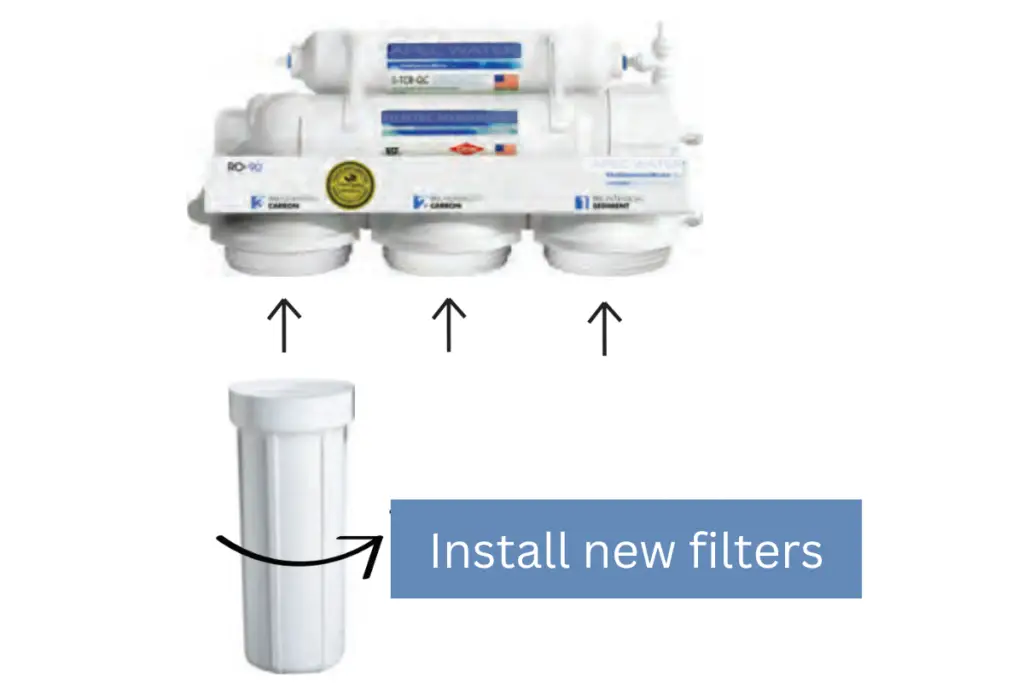
How to replace RO filters
While the steps to change a filter on a reverse osmosis system are different between brands and models, the general steps are the same:
- Empty the storage tank (not all systems have a storage tank, such as the tankless Waterdrop and Frizzlife systems).
- Turn the system off.
- Access the filter housing area.
- Remove the old filter and discard it (this may involve rotating it or levering it out to remove it).
- Open and remove all packaging from the new filter.
- The replacement filter should be inserted into the opening and turned or pressed into place.
- Make sure any O-rings are snuggly in place and that there is no dust or debris in the O-ring channels.
- Flush the system by turning on the reverse osmosis faucet, making sure the storage tank valve is still closed.
- Allow around 3 to 5 gallons of water to flush through the system.
- Close the faucet and open the storage tank valve to allow it to fill.
- When you’re done, be sure to reset all filter light indicators.
2. System needs resetting
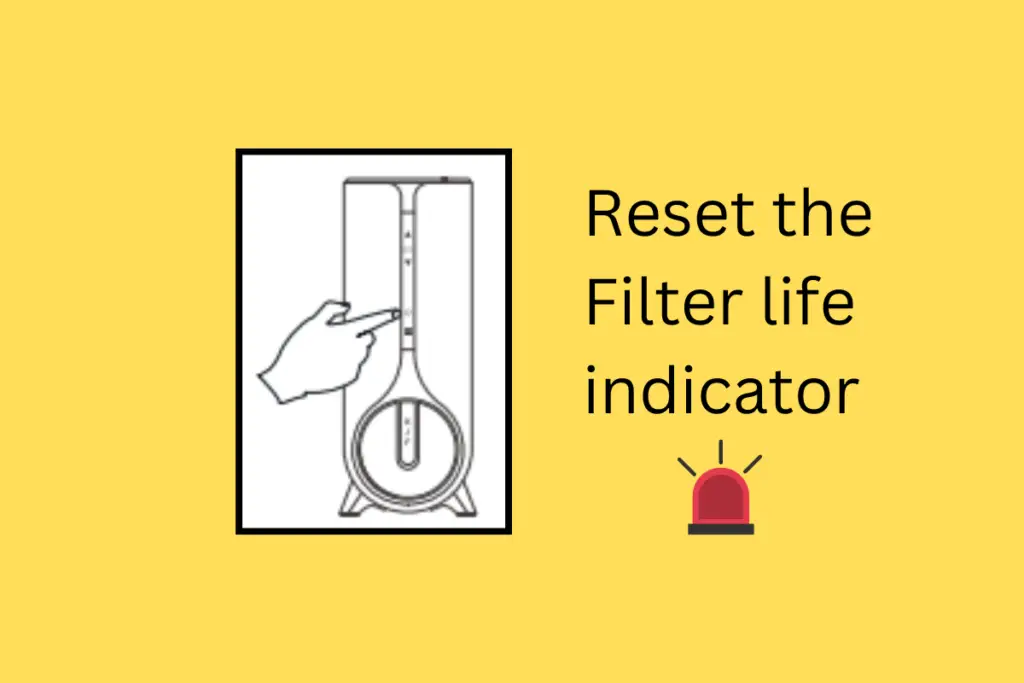
Some reverse osmosis systems flash red simply because they need to be reset. This is especially true after replacing any of the filters, which is usually followed by flushing the system.
Once a filter has been changed, the filter indicator needs to be reset to remove the red light. Failure to do that will result in the red light staying on (this information is clearly stated in almost every user manual).
Signs that your RO system requires a reset.
- The filter light indicator is still on even after replacing filters.
- You replaced filters but forgot to reset the filter light indicator or it failed to reset.
How to fix it
- Reset the filter light indicator.
How to reset the filter light on a reverse osmosis system
Resetting the filter light indicator will vary slightly between different reverse osmosis systems. The best thing to do is to check your user manual, or contact your brand’s customer service via their website.
However, to make it a bit easier, here are the general steps to reset the major brands of reverse osmosis systems – check for your brand below:
Waterdrop RO systems:
- Press and hold the RESET or FILTER button for 5-7 seconds until the system beeps.
Water Purification Guide has a complete step-by-step breakdown of how to maintain and reset each Waterdrop reverse osmosis model here.
iSpring RO systems:
- Press and hold the specific filter indicator light that needs to reset for 5 seconds until it beeps.
- The indicator light should flash and the membrane will be rinsed for 5 minutes.
- Press and hold the indicator light again for 5 seconds to reset.
Frizzlife RO systems:
- Press and hold the filter reset button (with the power on) until the light goes off.
3. Dead batteries
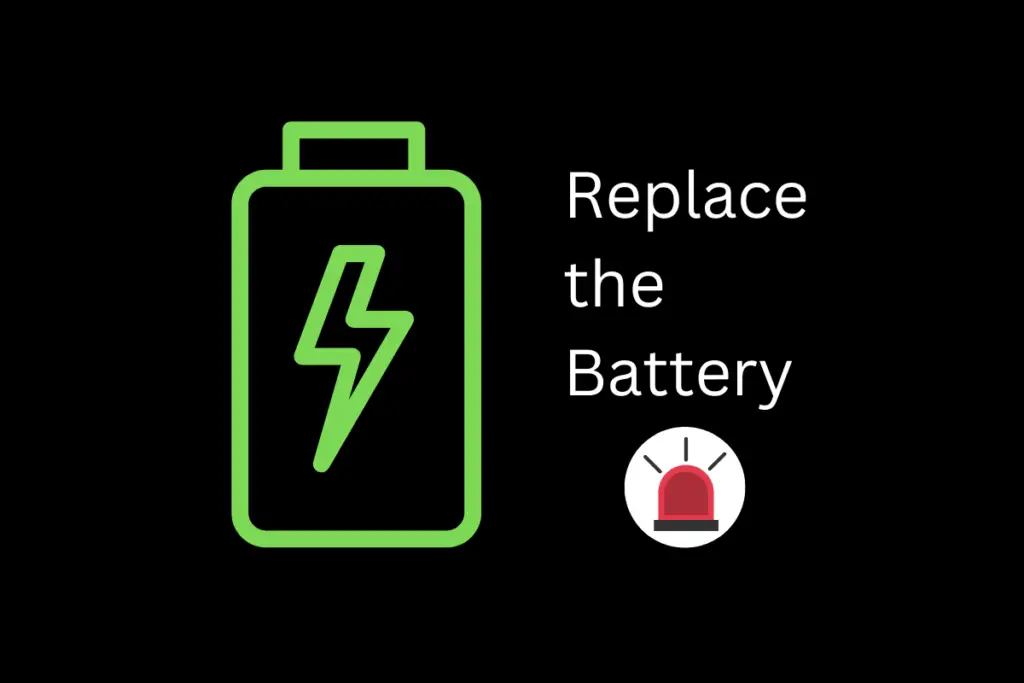
Dead batteries are a surprising reason why a reverse osmosis system can blink red. While most units don’t contain batteries, some reverse osmosis systems use batteries for their filter life indicators.
These batteries naturally become dead after a period of use.
These include some Waterdrop, GE and Whirlpool RO systems.
The batteries are usually located at the bottom area of an RO faucet. Usually on the RO faucet’s handle – where you can locate and open the battery holder cover to replace the battery.
Reverse osmosis system will likely blink or gently glow red to inform you that it is time to install new batteries, although some do flash orange.
How to fix it
- Check if the batteries are dead.
- Replace with new Lithium batteries.
How to replace the batteries on a reverse osmosis system:
Here are some examples from the major brands that use batteries in their filter life indicators:
How to replace batteries on the Waterdrop RO systems:
- Waterdrop ROs will glow red when the batteries need replacing.
- Turn off the faucet.
- Access the battery location – this will typically be in the bottom part of the RO faucet.
- Remove the expired batteries by opening the battery box and dispose of them.
- Remove the new batteries from their packaging ready to install them.
- Starting with the negative side, insert them into the battery box.
- Finish the installation, then close the battery box.
- After changing the batteries, the system will beep and the light will automatically change from red to blue.
How to change batteries on Whirlpool RO systems:
- Remove the screw from the faucet base’s right side.
- Once it is released from the base, press the battery housing upward from the faucet base.
- Change the battery.
- The battery should be inserted into the holder with the positive (+) side towards the back.
- The base’s light will first flash six times before going out when the battery is first replaced. If you see the six flashes, this means the battery is fully charged. The timer enters the six-month time cycle after the first six flashes.
- If it flashes twice repeatedly, the battery needs to be changed since it is weak.
- Replace the battery housing, then tighten the mounting screw tightly.
How to change batteries on GE RO systems:
- Find the battery holding cap on the handle of the RO product water faucet.
- Grab the cover by the openings on either side and then firmly pull it out of the faucet.
- To remove the lid, use a screwdriver, but take care not to damage the finish.
- Replace the old battery with the new one from the replacement prefilter/postfilter cartridge kit with a Lithium battery by removing it from the holder.
- Insert the battery into the holder with the positive (+) side pointing up or away from the base of the faucet.
- Ensure the battery holder is correctly positioned before re-sliding it into the faucet’s handle.
- Until the lid is flush, fully press it in.
- The faucet LED will briefly glow red and then blue when the battery is fitted.
4. Low water quality

Low water quality is a common reason why a reverse osmosis system is blinking red.
Some reverse osmosis systems feature a TDS (total dissolved solids) reading which shows the water quality.
When the system starts up, the integrated TDS sensor monitors the water quality and displays the TDS reading on the front panel display screen.
If the water quality is poor, the indicator will either illuminate (solid) or flash red. This can also be caused by hard water – a common problem across the continental U.S.
Because RO membranes generally remove 90% or more of the impurities from water, including TDS, a high TDS result usually means the filters and membrane will probably need to be changed more frequently than recommended by the manufacturer.
How to fix it
- Check and replace the RO system membrane.
- Replace filters as required.
- If you live in an area with hard water, a water softener can help (but is an expensive solution)
- Optional: install a pre-filter to prolong the RO membrane life.
How to know when to change a reverse osmosis filter
The filter replacement indicator will identify when to change the RO filters and membrane. Other signs to replace filters include the RO system being slow, the system not filling up, and water becoming cloudy or contaminated.
Water Purification Guide has a complete troubleshooting guide for slow reverse osmosis systems available here.
How to clear air from a reverse osmosis system
To clear air from a reverse osmosis system, open your reverse osmosis faucet and let all the water drain down the system. By doing this, the tank will be emptied, and all extra air should be eliminated from the system cleaning air.
Why is my Whirlpool reverse osmosis yellow light blinking?
Whirlpool’s reverse osmosis system blinks yellow because the prefilter and postfilter cartridges are clogged and require replacement. This is usually after around 6 months of usage (or more).